Menu
We’re in the middle of a challenging growing season with significant crop stress in many areas of the Mid-Atlantic region. Entering the tasseling and grain fill stages raises many questions.
• Should I put fungicides on my crop this season?
• Do fungicides help under drought conditions?
• How much disease pressure is there?
• Which diseases are likely to be most problematic this season?
• Some people tell me to apply fungicides, and some tell me not to; who’s right?
Let’s think through some of these questions.
Do fungicides help under biotic or abiotic stress?
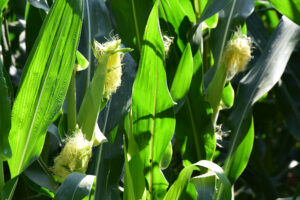
Heat and drought are abiotic stresses, while diseases or nutrient deficiencies are examples of biotic stresses. We know that fungicides protect against selective pathogens that can infect the plant. Different chemistries or modes of action give different levels of control against various disease organisms, helping the plant defend itself against yield-robbing infections. Some fungicides that contain strobilurin chemistry can assist with stress mitigation from abiotic stress. Ethylene is a hydrocarbon gas and a naturally occurring plant hormone. Strobilurin chemistries can regulate ethylene production within the plant, allowing the plant to better handle abiotic stresses by affecting plant growth, respiration, and water use efficiency.
What potential diseases could be problematic this season?
Penn State positively identified Tar Spot on July 10. It is already present in fields in multiple counties across Pennsylvania. This infection date is considerably earlier than any of the past three seasons. Early on, we believed Tar Spot would be most viable and problematic when temperatures were milder, as in the following statement: Cool temperatures (60°–70° F), humid conditions (>75% relative humidity), and at least 7 hours of leaf wetness due to rain, fog, dew, or overhead irrigation favor Tar Spot infection and development. We need to rethink this based on the heat and drought stress we have experienced this growing season and the fact that we already have infections. Tar Spot is a critical disease to prevent because once it sets in, it is not curative with fungicides, and heavy infections can be a significant yield robber. We can also expect Grey Leaf Spot to be challenging when heat and humidity are present.
Application timing…
Typically, we lean towards early applications to prevent disease infections. The application window is large and can range from initial tassel emergence through brown silk. With today’s fungicide portfolio, we have longer-lasting technology that can protect for more than 30 days, so applications applied at silking will keep you protected through the grain fill stages of growth.
Some people tell me to apply fungicides, and some tell me not to. Who’s right?
They both are! Realistically, severe drought stress may limit the crop beyond the point of getting a reasonable response or return on investment with a fungicide. Though strobilurin fungicides can help manage abiotic stress, they do not override the need for adequate rainfall to build yield.
Let’s be objective, identify the fields that have the greatest yield potential, and protect them. Some later-planted corn may be more at risk as the disease pressure builds throughout the season.
The weather has been very spotty across the Mid-Atlantic region, and we need to ask all the right questions as we consider our options to protect the crop and maximize yields for the rest of the season. We are always eager to assist you in any way we can to optimize your crop management efforts.
Year to year, soybean diseases can vary significantly, so what might 2024 look like?
This past year, diseases like charcoal rot, frogeye, and white mold created headaches for growers in the Mid-Atlantic region. With the dry-wet-dry weather pattern at specific growth stages, charcoal rot and white mold seemed to impact yield most.
As we have entered the 2024 growing season, we are dealing with much more rainfall than we had at this same time last season, so our disease potential is going to shift toward water molds and diseases like seedling blights, Phytophthora root rot, Sclerotinia white mold, sudden death syndrome, mildew, frogeye, etc.
If you have planted soybean varieties treated with a good seed treatment program, you will likely avoid early-season diseases such as seedling blights and Phytophthora root rots and have some protection against early-season pests like bean leaf beetles or aphids.
Given the environmental conditions we have had so far—lots of moisture and some cold nights—a couple of diseases have the potential to be significant this season.
Sudden Death Syndrome (SDS) usually doesn’t exhibit symptoms until around flowering time. Still, the disease infection enters the plant during early vegetative growth stages, particularly during cold, damp growing conditions. SDS is best managed by selecting varieties with a high resistance to the SDS pathogen. Only a few fungicides have activity on SDS, and they must be applied early in the growing season, usually about 10–14 days after emergence, to target the protection at the growth stages of early infection.
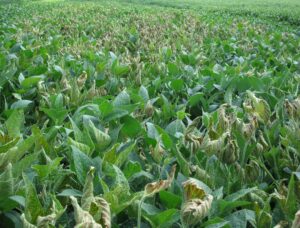
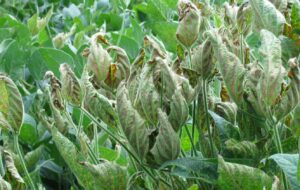
Sclerotinia White Mold (SWM) is another more prevalent pathogen when the growing season is wetter. This is another challenging disease that requires early management to control. Currently, several fungicides have been labeled for SWM protection. But again, your best choice is to start with genetics with a high resistance to SWM. If you have persistent SWM issues, there is another biological fungicide that we use to treat the soil, and it attacks and destroys the sclerotia in the soil, reducing the level of infection your crop will need to defend against.
Frogeye Leaf Spot is likely to be a challenge again this season, and this one is more easily managed with specific fungicides. There are some fungicide resistance issues across the southern counties in Pennsylvania and farther south, so choose fungicides with multiple modes of action that have activity on this specific pathogen.
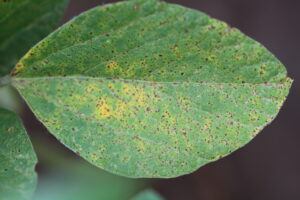
Septoria Brown Spot is a common soybean disease most severe during cool, damp growing conditions. The Septoria glycines fungi typically start on the lower canopy of the plant and move upward as the disease intensifies. Multiple fungicide options are available, and the yield loss from this disease can be up to 20%, so it is often beneficial to invest in controlling this disease.
We’ll be walking and scouting fields all summer, and as agronomic issues arise, we’ll be poised to assist you. If you have questions about managing these challenging diseases, contact our team at PowerAG. We can provide options tailored to your individual needs and yield goals.
Each season is filled with unique concerns, and we are ready to help you with crop protection recommendations and fertility programs designed to give your plants optimum nutrition and support their natural defensive capabilities.
The pH of water does impact the efficacy of many pesticides.
When water pH is too high, alkaline hydrolysis is likely to occur, causing pesticides to significantly degrade, sometimes to the point that they become inactive. This degradation often happens in the spray tank before the pesticide reaches its intended target.
Water sources are important for pesticide application. It is essential to test your water source so you know what pH you are starting with. Many wells in Pennsylvania will typically be between 7.5 and 8.5 pH. Pond water is usually higher in pH, starting around 8.0 pH in the spring and increasing to 9.5 pH or so as the weather warms up. Rivers and creeks can vary significantly but are generally slightly lower in pH than pond water.
During tank storage, the water’s pH will increase. If you spray and refill frequently, you can pretreat your storage tank. Acidifying water in a holding tank will not maintain its acidity very long, so we recommend conditioning your water as you load the sprayer as much as possible, using products like Turbo, TurboCharge, or Vaporize when you need an acidifying agent.
It is important to know the pesticide pH requirements; most of the time, the label will direct you to the appropriate water conditioner. However, using multiple pesticides in the same tank mix can become very complex because a few active ingredients require a higher pH. If you have questions, ask your pesticide supplier for assistance.
If your water is above 7.0 pH, it is generally recommended that you acidify your tank mix. Many pesticides work well in a spray solution around 5 pH, and products like glyphosate benefit from an even lower pH.
We’re approaching a time in the season when many growers may be applying an insecticide like dimethoate. This is an example of chemistry that is very sensitive to pH. If your water supply is 9.0 pH, the half-life of dimethoate is about 48 minutes. If you use high-pH water and apply dimethoate, the efficacy drops by half in less than an hour. In contrast, if you acidify the tank mix solution down to 5 pH, the half-life of dimethoate extends to 20 hrs. Captan is also a widely used fungicide that is very sensitive to pH. A pH of 8.0 will reduce the captan half-life to 10 minutes. Reducing the pH to 7.0 changes the half-life of captan to 8 hours. That’s a 48x increase in the efficacy of captan simply by lowering the pH from 8.0 to 7.0. Saflufenacil is a herbicide on the other end of the spectrum and needs a pH above 7.0 to maintain efficacy, so check each label carefully.
The pH of your water can quickly impact the chemistry’s ability to kill the target pest. These are just a few illustrations of the importance of managing your pH, so following each pesticide’s label is necessary.

Water hardness is another aspect of your water condition. Calcium and magnesium are the primary drivers of water hardness, but iron and sodium can also contribute to the problem. Since calcium and magnesium are positive cations, they typically bind up a negatively charged pesticide, reducing its ability to perform. Many pesticide labels call for adding a non-ionic surfactant, such as Spreader820 or Spreader910, to the solution. These products help neutralize the influence of negative anions vs. positive cation charges in the tank mix, helping with tank mix compatibility and improving your pesticide performance.
Here at PowerAG, we’re always happy to help you find the best options for your farming operation. Call us today for all your water conditioning needs.
DISCLAIMER: This blog is for educational purposes only. Where trade names appear, no discrimination is intended, and no endorsement is implied. All trademarks and logos are the legal rights of their respective owners.
As we turn the calendar page to March and winter turns to spring, one of the first crops we focus on is wheat acres.
There are three critical decision points in successfully growing high-yield wheat: Planting (seed genetics, seeding rate, stand establishment, and fall weed control), Nutrient Management (fall fertility, nitrogen management, and pushing the yield to the finish), and Pest Pressure (season-long disease control, controlling head scab to protect grain quality and insect protection).
PLANTING—the first critical decision is already behind us. Important considerations included choosing the best genetics available, planting the proper seeding rate to reach our goal, and managing foundational fall fertility.
Let’s look at how we did. Are you out walking your fields now? What do your stands look like? High-yield wheat will require 25–40 plants per square foot, and hopefully, by now, we have established five or more fillers per plant. Here’s where genetics may show variability. Some varieties tiller better than others, so for those varieties that tiller less, we recommend pushing up the seeding rates to achieve the number of heads required to promote maximum yield.
Yields above 100 bushels per acre need 60–80 heads per square foot. If we are successful with our fertility program, each mature head per square foot can represent 1.2–1.5 bushels per acre. You can do the math: 60 mature heads can push yields to 120 bu/A, etc.
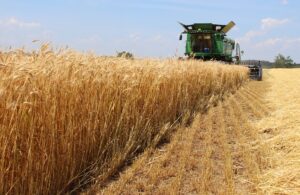
NUTRIENT MANAGEMENT—the second critical decision point is right before us. Hopefully, we’ve checked out pH, applied lime if needed, and applied 15 units or so of nitrogen in the fall with a little sulfur, and now we’re ready to set the crop up for maximum nutrient uptake and higher yields.
How many nitrogen applications are you planning? If you intend just one application, we certainly recommend applying N with a nitrogen stabilizer like N-Ergize, along with CarbonMaxx at the rate of 1 pt/per 50 units of applied nitrogen. Up to 25% of the UAN solution applied is in the form of ammonia, which contributes to leaf burn. The CarbonMaxx product helps to arrest the ammonia in the UAN, reducing the leaf tissue burn.
Many growers prefer to split-apply nitrogen, which we recommend. The first application is applied at green-up in the spring. With this application, we are trying to enhance the tillering during the early growth stages. Time the second application close to Feekes 5–6 to provide adequate nitrogen for maximum plant uptake during vegetative and grain-fill stages of growth. Consider using a growth regulator on these high-yield acres to prevent lodging while pushing for the highest yields.
High fertility is not the only contributing factor to potential lodging issues. Crown rots and other diseases like Strawbreaker, also known as Eye Spot can be problematic in parts of the Mid-Atlantic region. Fall-applied fungicides that control Strawbreaker have proven effective in managing this disease. The primary infection of Strawbreaker starts on or near the soil surface, affecting the coleoptile or base of the plant, and can contribute to significant lodging issues, especially in high-yield soils.
PEST PRESSURE—the third critical decision point is the management of diseases and insects. Again, we are past the decision point for the fall programs, and now our focus is on managing powdery mildew, leaf rusts, leaf blotches, and getting good head scab control. Not every disease is yield-limiting annually, but careful management and prevention of these diseases are vital to maximize yields and preserve grain quality. We usually look at fungicides as the critical ingredient for disease control. Still, we don’t forget the importance of balanced and adequate nutrition to enhance the plant’s capacity to defend itself against those pathogens. Aphids, cereal leaf beetles, and other pests must be scouted for and controlled.
What are some of the key nutrient drivers in high-yielding wheat? Nitrogen is essential but don’t overlook phosphorus. Potassium, calcium, sulfur, zinc, boron, copper, and molybdenum are all necessary for high yields.
___________________________________________________________________________________________
Here at PowerAG we can help you with crop protection and nutrient needs recommendations. CarbonMaxx, N-Ergize, BorPower, AlphaPower MP, KwikPower, and DynaMino are all products that can be tailored to your wheat crop needs. Talk with your PowerAG sales rep to achieve your high-yield goals.
As we tackle the issues of weed resistance management, weeds like marestail have been very problematic this season. One of the factors that made marestail harder to control in burndown applications this spring was that winter 2022-23 was mild, allowing the marestail to develop to a more advanced growth stage by the time of application. As we approach next season, we should consider things that can improve our control of this troublesome weed.
Marestail (or horseweed) typically has two primary periods of emergence—one in the late summer/fall and the other in the spring. Managing both flushes can be challenging; however, there can be good opportunities for effective marestail management with various tactics in the fall.
-
Cover Crops
Cover crops can be very beneficial in managing winter annuals and overall minimizing weed pressure. However, specific cover crops are vital to target marestail control. Cover crop blends that include clovers, radishes, peas, etc., will make it impossible to use any herbicide control late in the fall or early spring. Consider a cereal cover crop like rye or wheat on acres where you need to aggressively target marestail because, in cereal crops, you have herbicide options in both the fall and spring. Products like 2,4-D and dicamba can be sprayed in the small grain cover crop this fall (or early spring) to check smaller marestail seedlings.
-
Winter Wheat and Barley Fields
In production fields of winter wheat or barley, it is often necessary to manage marestail. Fall applications of products like 2,4-D, dicamba, MCPA, Huskie, or Quelex are helpful when controlling marestail and other types of broadleaf weeds.
-
Fall Burndown Herbicide Applications
In fields that will be fallow (i.e., no cover crop) this winter, fall, and even late fall, herbicide applications, including some residual activity, can be beneficial in controlling marestail. Killing the marestail that germinates in the fall, especially when the seedlings and rosettes are tiny and more easily controlled with herbicides, dramatically improves your control for the following season. Once the marestail gets beyond the rosette stage and starts to bolt and grow vertically, it becomes much harder to control. In most cases, a basic tank mixture of 2,4-D ester (1 pint/A) plus glyphosate (1 quart) plus metribuzin (3-5 oz DF) tends to provide adequate control of marestail and other weed species. It is relatively economical when sprayed in the fall. Other products such as dicamba (8 fl. oz.), Gramoxone, Liberty, Valor, Canopy/Cloak (if planting soybeans next season), or simazine (corn) are helpful as well, but watch out for restrictions. Also, try to keep the fall burndown herbicide costs at a minimum since you will need to account for other herbicide costs next spring to control marestail in the crop.
-
Tillage
While tillage is not an option for every grower or every acre, it’s an excellent management tool for marestail. Marestail is a surface germinating weed, so tillage that buries the seed stops it from germinating. Tillage doesn’t need to be deep tillage; even aggressive vertical tillage reduces marestail significantly.
__________________
Start planning in the fall for next season, and you will successfully manage this tough-to-control weed. If you have more questions about weed control, call us; we will gladly help!
Co-authors:
Dervin Druist, PowerAG Agronomist
Dwight Lingenfelter, PSU Weed Science
Cover Crop Burndown and Maximizing Yield
The use of cover crops and their value has increased over the past number of years. However, many questions come up about how and when is the best time to burn down those cover crops. There has been some adoption of planting green into more mature cereals, and the results of that have been mixed based on the growing season, rainfall amounts and other environmental factors.
With spring just around the corner, I want to focus today more on the timing of burndown, to maximize yields. There has been ongoing research at Iowa State University from 2009-2018, that I will reference, because it mimics what we have seen in the fields in recent years.
There are many benefits to cereal crops used as cover crops, however we have noticed some things that can help us better utilize these cover crops and still maximize yields.
The first thing that I want to address is the fact that the timing of burndown, can have in impact on yield.
Burndown Timing and Seedling Diseases
The potential for yield loss exists due to various factors. One contributing factor is the timing of burndown, and the decaying cover crops can increase the potential for seedling diseases, especially fusarium and pythium species. Research has shown that winter rye can be a host crop of these pathogens, increasing the potential for corn seedling diseases.
We all know seed treatments can help a great deal in managing seedling disease, but there are significant differences in the level of control from the various seed treatment options seed companies use.
In the Iowa State trials, the closer to planting you terminated the cereal rye, the greater the incidence of seedling disease pressure.
We all know if we have seedling disease pressure, it can affect the timing of seedling emergence and the uniformity of the seedling emergence.
Below is a chart that shows corn yields based on termination of the cover crop from 21+ days before planting, to 1-2 days after planting. As you will see in the data, terminating the cover crop earlier consistently gives you a greater opportunity to maximize yields.
Early Termination Can Improve Yields Significantly
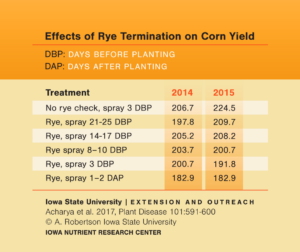
My recommendation has always been to try and terminate the cereal crop 14+ days before planting, and I think the Iowa State data confirms the advantage of that timeline. Another benefit of early termination is the cover crop has enough time to decompose to the point it is brittle and much easier to plant through.
Earlier termination also can make the cereal crop easier to kill. Once cereal crops get beyond feekes 6-7, they can be more challenging to control with paraquat. However, we know that adding a triazine to a paraquat application can enhance the efficacy of the product. Glyphosate does a good job on cereals, but under cooler conditions it can be a very slow kill.
Tank Mix Options
Remember when putting your tank mix together to choose the right adjuvant for the situation. With glyphosate you want to add AMS or a water conditioner like Turbo or Vaporize. However, If you add Kixor® herbicide to glyphosate, do not use a water conditioner that acidifies the tank mix, or it will reduce the efficacy of Kixor®. With paraquat, the use of Spreader 820 or another non-ionic surfactant is recommended. (Kixor® is a registered trademark of BASF.)
At PowerAG our customer service team is always ready to assist you in any of these decisions, so feel free to contact us if you have any questions.
Entering a spring where costs are higher on most inputs in crop production leads to many discussions with growers about fertility inputs for this season.
The first and most important recommendation is to focus on balancing nutrients between the different elements. Because many vital nutrients are co-dependent, keeping the overall balance of nutrients in focus is a priority. Sometimes the cost of an individual component gives us pause to its importance for this growing season. However, if we choose to cut it out of our crop plan, it may have secondary implications because of its importance to the crop or its relationship to other vital nutrients. Build a balanced plan using soil and tissue tests to maintain proper balance of nutrients throughout the growing season.

Balance of nutrients is essential to maximize yields!
A second important area of focus is the pH of the soil because of its critical role in the nutrient availability of key components, such as potassium and many micronutrients. Available calcium is also an essential building block to cell wall development and strength of the structure in almost all crops.
The third area I want to remind us of is the importance of soil porosity, especially in the root zone. Getting oxygen into the root zone is vital to maximizing crop yields. Utilizing cover crops, crop rotations, and limiting wheel traffic when soils are wet all help reduce compaction. Soil health is also an essential part of maintaining adequate soil porosity. Earthworms, biologicals, and bacteria help break down crop residue, mixing these residues into the earth, and helping solubilize vital nutrients – all working together to build a healthy soil and a nutrient-rich root zone.
I want to share a fourth thought: “Should I feed the soil or the plant?” We have all had a sales person drive up with some fantastic product for sale, and a comment is offered, “If you do this, it will replace that.” Here at PowerAG we believe in foundational agronomy. Research has proven that it takes certain levels of crucial nutrients to produce a bushel of corn, soybeans, wheat, etc. So foundational agronomy means we start from the ground up. We encourage growers to do all they can to increase soil health and biological activity in the soil, and we sell and promote products that can enhance the physical process of solubilizing nutrients in the soil, making them more available to the crop. Feeding your soil first, building upon a solid fertility program is our recommendation. Then during the growing season, you can improve your crop’s chances of maximizing yields by timely applications of nutrients, applied either near the root zone or through foliar applications. Remember, the cuticle of the leaf has a limited ability to absorb nutrients, so a crop nutrient plan that lacks a solid soil base of nutrients cannot be fully restored to maximum yields exclusively through foliar applications.
So, to wrap it up, focus on the balance of nutrients vs. volume if your budget requires restraint. Add lime where needed; it may be your best dollar spent for the 2022 crop plan. Remember to do all you can to manage your soils – achieve a porosity that promotes oxygen, nutrients and moisture absorption into the root zone.
High yields don’t come by accident! Execute a good plan, build a solid fertility foundation, and then add to it when there is a chance you can add yield and profit to your bottom line.
From all of us at PowerAG, have a safe planting season.
As we enter the hot humid days of summer, our corn crop is going through the critical process of pollination. In this article we’ll discuss some of the critical temperatures and moisture issues that can have an impact on pollination. Corn is a monoecious crop that relies on the flower pollinating the silks to complete the fertilization process. Each silk thread is attached to two kernels, and when the ovule is fertilized, kernel formation starts.
Timing is critical to the pollination process
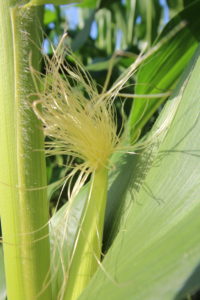 The silk formation and emergence needs to be timed with the shedding of the pollen. If all goes well in a corn field, the silks will begin to emerge from the husk 12-36 hours before the pollen grains start to fall. Pollen shed usually occurs over a 5-6 day period, providing a window of opportunity for the pollination process. If we miss “the nick,” the emergence of the silks and the timely shedding of pollen, the pollination process will fail.
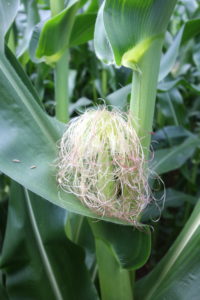
Silks can grow 1-2 inches per day under normal growing conditions, and will continue to grow for about 10 days or until they come in contact with a grain of pollen. Once the pollination process is complete, silk growth stops. Newly emerged silk has a pale green, translucent appearance. But once the silk is fertilized it rapidly changes color.
Factors affecting pollination
- Rainfall – Heavy rainfall, or rainfall that lasts for several days, can wash the pollen off before it has a chance to fertilize the silk. The tassel emits pollen at two different times during the day, usually mid-morning and late in the day.
- Drought – When you have a combination of low soil moisture and high temperatures which often causes more water to evaporate from the plant, silk growth is slowed. In times of extended dry conditions, silk growth can be reduced to near zero. Drought conditions affect silk development much more than pollen development. In extreme droughts, it is possible that the pollen grains have all fallen before the silks have emerged, resulting in a cob with only a few kernels developed.
- High Temperatures – Long periods of high temperature can have a significant impact on the pollination process. Hot temperatures can inhibit the production and release of the pollen from the tassel. Silk tips can scorch under intense heat. If the silk tips scorch, it retards the ability of the silk tube to receive the pollen and the result will be two missing kernels on the cob. Temperatures above 85 degrees decrease the amount of pollen that is shed.
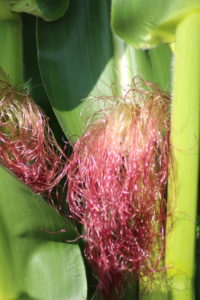 Under normal growing conditions, a grain of pollen can remain viable for up to 24 hours, but in hot dry conditions, that viability can be reduced to two hours or less. In temperatures of 100 degrees or more, the pollen may lose all viability before it has a chance to fertilize the silks. Even though drought can severely affect silk elongation, heat usually does not slow the silk’s growth.
Night-time temperatures are very important during this time of pollination. When the night temperatures fall below 75 degrees, the plant has a chance to recharge and refresh itself before another day of heat stress. If the nighttime temperatures do not drop below 85 degrees, it significantly increases the stress on the plant and risk of poor pollination.
Corn is a resilient plant and a marvel of creation. It’s ability to withstand heat and drought is remarkable. We’ve all seen crops that have endured a lot of stress and yet went on to yield a bountiful harvest. I hope your crop does well this season!
Since your corn crop is off to a great start, it is time to evaluate if all your nutrient needs have been set up to achieve high yields. Foundational fertility is always the essential link to building higher yields. If you’ve tested your soils and applied the necessary nutrients, what’s next?
The secret to achieving high yields, is to set up your whole fertility system to support maximum nutrient uptake, which occurs in the 12 days leading up to pollen shed. During these stages of growth, the plant continues to grow while beginning to transition into ear development and grain fill. In these 12 critical days, the nutrient demand from the plant is huge. Your corn crop will demand 40+% of the total Nitrogen, 40-50% of the total Potassium, and 20+% of the total Phosphorus it will use during the growing season. Here is what that looks like. 250-bushel corn will need 100+ lbs of Nitrogen, 120-130 lbs of Potassium, and 20-25 lbs of Phosphorus during those 12 peak uptake days. This is why foundational fertility is so critical.
Your soil needs a deep reservoir of nutrients in proper balance of both macro and micro nutrients for the plant to be able to achieve maximum nutrient uptake. The corn plants must have a large and strong root system established, and the soil needs to have enough moisture to mobilize the nutrients and recharge the root zone as the plant draws from the available resources.
Growers today manage their nutrient supply by timing the applications of nutrients to match the peak uptake needs of the plant. Side-dress applications of Nitrogen and Potassium help growers achieve that goal. The use of Nitrogen stabilizers like N-Ergize are also helpful in managing nutrient availability. University research results tell us that up to 30% of the applied Nitrogen is at risk to volatilization and/or denitrification. The cost of Nitrogen stabilizers is 1-2 bu/acre of corn, and the potential is there to save more of the Nitrogen that is applied.

You can monitor your nutrient use efficiency by doing tissue samples of the corn on a weekly basis, starting at V6 stage of growth through brown silk. Deficiencies can be addressed by applying more nutrients through the soil or utilizing highly efficient foliar macro and micronutrients. With commodity prices lower, it is important that you make fertility decisions that provide a positive return on your bottom line profitability.
Have you checked your Magnesium levels lately?
As seasons come and go, I’m always looking for ways to improve our productivity and profitability. Each year we look for issues or trend lines that we see across many acres, and try to tweak our recommendations and offer insights to enhance profitability. Over the past 3-5 years we’ve seen many growers running behind in their Potassium levels. And the reason was largely a side effect of a few years of high potash prices compounded with the fact that we had several record breaking corn yield years, and the soil reserves got drawn down.
The latest trend I see is… many soil tests show a less than desirable level of Magnesium. Why is that? I think we’ve done a good calling attention to the Potassium needs and building back the Potassium reserve, and we usually do a good job with Nitrogen. Many acres across the region also have access to manure, so Phosphorus levels are fairly easy to maintain. By default, Magnesium has become a forgotten element, or has just been overlooked.
Magnesium: Essential for Plant Growth and Development
Magnesium plays many roles in crop development, and is essential to the production of chlorophyll within the plant. It is also vital to the photosynthesis process within the plant, taking energy from the sun and helping to develop sugars and starches that feed the growing point within the plant. Magnesium also assists in carrying Phosphorus to all parts of the growing plant.
What Impacts Magnesium Availability in a Plant?
First, did you know that Magnesium is largely immobile in the soil in cooler soils? Soil temps below 55 degrees, reduce the availability of Magnesium. Did you ever hear cattlemen talk about grass tetany? Grass tetany comes from a lack of Magnesium in the spring when the grass is young and the ground is cool. The cool soils restrict the availability of Magnesium, which can then trigger grass tetany. What about your crops early in the spring? Particularly grass crops such as corn or cereal grains used for forages? Do they have enough available Magnesium to maximize productivity?
Second, what about your soil reserves? Do you have enough Magnesium to meet the needs of the crop you intend to grow?
Stunting of growth and pale-yellow stripes in the leaves with a purple leaf edge are symptoms of Magnesium deficiency.
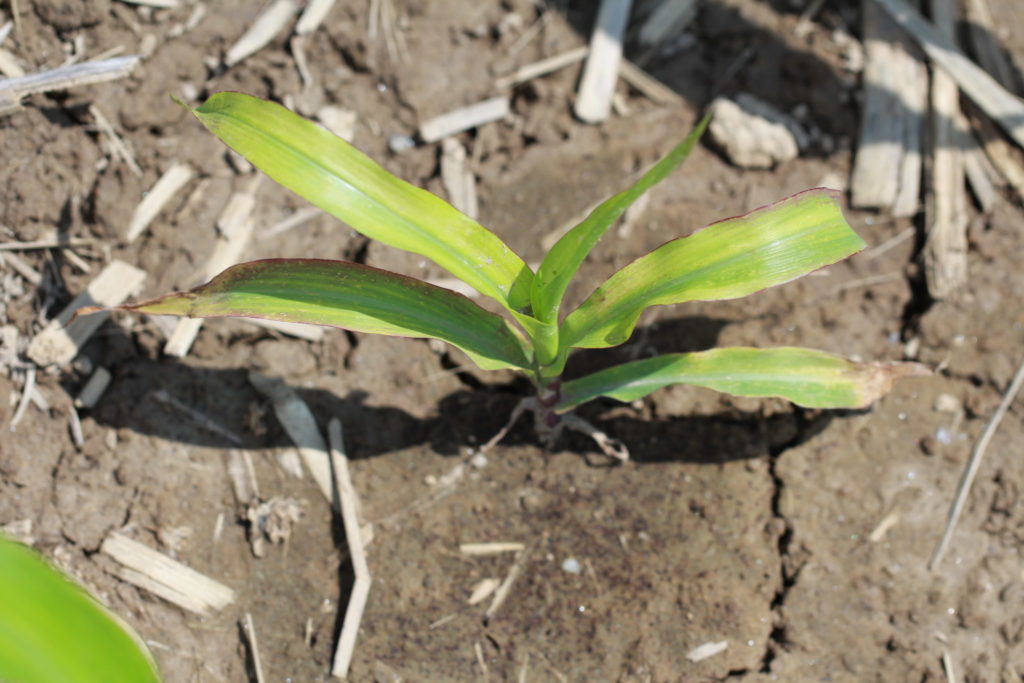
There is another part of the plant that often suffers unnoticed. Did you know that low Magnesium levels can impact root development? Yes, even when symptoms are unnoticed above ground, lower levels of Magnesium may be impacting the formation of roots underground, which may limit the overall nutrient availability to the crop.
Other elements can also interfere with the availability of Magnesium. Excessive Potassium levels can reduce the uptake of Magnesium. Low soil pH decreases the solubility and mobility of Magnesium in the soil, and drought conditions increase the risk of Magnesium deficiency.
What are the Best Sources of Magnesium
Magnesium is available from multiple sources. Here at PowerAG we have MagPower available, which is a chelated form of Magnesium in a liquid formulation, designed for foliar use. Other sources include dolomitic lime and various fertilizer blends. Sometimes your Calcium levels are already high and you need to source Magnesium from a non-calcium source.
We’re always interested in seeing you grow a good crop, so check your soil and tissue tests to make sure Magnesium is not holding back your yields. Always remember, it’s not just about one element in soil fertility, but the proper balance of each one. As always, here at PowerAG, we stand ready to assist you in any way we can.
We’ve just come through a challenging fall and winter for wheat, and it’s time to evaluate the crop to determine how best to maximize yield and profitability this season. As the wheat crops breaks dormancy, it’s a good time to check stand counts. To verify we have enough plants per acre to sustain our yield goals, I like to see 25-40 plants per square foot, with each plant carrying 3-5 tillers. Ideally, we want to achieve 60-80 heads per square foot, to hit a yield target at or above 100 bu/acre. Each mature head per square foot, can represent 1.25-1.5 bushel per/acre. If you have fields with less than 20 plants per square foot, you may want to plant another crop such as corn or soybeans to maximize your profit potential in 2019.
Match up your fertility program to your yield potential
Apply 1.2-1.5 units of Nitrogen for every expected bushel of yield. Peak Nitrogen uptake occurs between Feekes stage 6 & 10. If your wheat is small, or thinner than you like, don’t delay putting down Nitrogen. An early Nitrogen boost can really enhance tillering, setting up bigger yields. Split applications of Nitrogen are preferable.
Check on Phosphorus & Other Micro-Nutrients
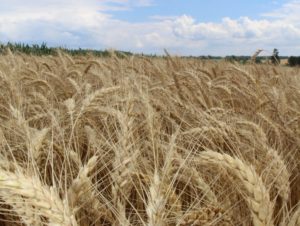
Phosphorus is sometimes overlooked in wheat production, but is critical to tiller growth. Most all of your yield comes from 3 stems, the main stem, the T1 stem, and the T2 stem. The T1 stem begins to form when the primary stem reaches the 2-3 leaf stage, and the T2 stem begins to develop about a week later. If the plant has limited availability of Phosphorus during this critical growth stage, tiller development is stunted, and yields will be impacted. Sulfur and several other micro-nutrients such as Copper, Boron, and Zinc are important in high yield wheat. High quality wheat is vital to maximize profitability, and the use of fungicide to control diseases and head scab are recommended.
Falling Numbers
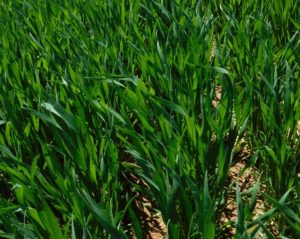
Recent research has highlighted another opportunity to manage wheat quality. When you take a load to the grain elevator, they test it for Falling Numbers. Falling Numbers measure the amount of alpha-amylase that is active in the kernel of wheat. When wheat reaches physiological maturity, it goes through a dormancy period before germination can occur. Once through the dormancy period, any moisture or heavy rainfall event can trigger the seed to produce alpha-amylase. This is the natural process of the seed utilizing alpha-amylase to break down the starch in the kernel to feed the new seedling as it sprouts and begins to grow. The breakdown of the starch reduces the Falling Number, affecting the quality of your wheat. Low Falling Number wheat makes poor bread or pretzel dough.
Consider Applying Molybdenum to Wheat
Recently, agronomists and growers have begun to apply Molybdenum to wheat. Studies have shown that Molybdenum can extend the length of the kernel dormancy period in wheat by up to 2 weeks. This extension of kernel dormancy gives you a longer window to harvest a high-quality crop, with a higher Falling Number, improving your profit opportunity. Applying 1 qt/acre of MolyPower along with your spring application of Nitrogen and another 1 qt/acre around flag leaf timing is recommended.
Other Factors that Affect Falling Numbers
It is always best to harvest wheat timely to ensure grain quality, but we also know that harvesting mature wheat that is green, will result in higher than normal alpha-amylase levels as well. Weather can trigger an increase in alpha-amylase production. Cold temperature shock, 25-30 days following pollination will induce higher alpha-amylase levels. Daytime temperature below 65 degrees and nighttime temperatures that dip below 45 degrees, will have an impact.
Welcome to this new blog where we will focus on many things related to production agriculture. Let me first tell you some of the guiding principles that drive my day by day activities, and guide my thought processes. You will see these principles guiding our conversations as I seek to put practical, functional agronomic information into a format that I hope can be helpful to you.
First, I have a passion for Agriculture and God has blessed me with the opportunity to work in Agriculture my whole career. Growing up on a dairy farm, I had to find a way to get out of milking the cows, so I spent as much time as possible out in the fields. Because of my love for the outdoors, I have developed a corny relationship with plants. I love seeing things grow, and I’ve never had a corn plant yell at me! I enjoy walking fields, trying to understand what’s growing on, and seeking to unlock the code to higher yields.

The second guiding principle I go by is, “You can’t save your way into prosperity.”To many times, decisions are made with a focus on “out of pocket” costs, rather than the potential “Return on Investment.” As farmers, we all have a multitude of decisions that we make going into every crop and season, and the financial commitments are significant, yet we must focus on our overall objective; which is to maximize our “Return on Investment.”
The third guiding principle is to remember, almost anything will work somewhere, and nothing works everywhere. Innovation in agriculture is astounding. Nearly every day you can come across something new, or some new way to do something. Sorting through all the things that are thrown at us, takes a determined perspective, and requires us to take the emotion out of the decision-making process. There are lots of really cool things we could purchase and some really great ideas somebody else came up with, but is it right for me? Does it fit into my farming needs? Does it increase performance and profitability?
The fourth guiding principle challenges me daily in my agronomy role. How do you find and remove that largest obstacle to higher yields in your production system? Taking an objective analysis of the most limiting factor, is the quickest way to find success in building higher yields, and the answer will be different for every farm.
This blog is a new venture for me, and I hope you find it helpful. We plan to put out agronomic articles monthly, and may add additional tidbits of information along the way as we uncover interesting things going on while we’re outstanding in your fields! We’ll also assist you with information about the features and benefits of our Power Ag brand of products.
I look forward to having those conversations with you; as together we focus on feeding a hungry world.
As growers look for ways to maximize productivity, the question comes up, “What is the best fertility recommendation?” The challenge growers have to deal with is, “What do I do with all the different opinions that are out there?
One of the first questions we need to sort out in the decision-making process is, “Are you going to feed the crop or are you going to fertilize the soil?” You probably will quickly respond, “Both.” Is there a difference? Does the difference change how you make your crop fertility decisions? Stop and think about it for a second, the plant doesn’t live in the soil, it lives in the water (soil solution) within the soil profile. If you doubt me on that, just ask yourself what happens when you remove the water from the soil profile? The plant dies. So let’s think about your fertility strategy. Are you going to fertilize the soil or are you going to feed the crop?

Our traditional way of fertilizing the crop is based on soil testing and making recommendations based on the level of nutrients within the soil, the organic matter, the CEC levels, etc. all of which are very helpful tools. What if you took another step in your fertility analysis, and started looking at your fertility needs based on what the plant told you it needed? What if you started taking tissue tests frequently, of the crop you are growing, and then adjusted your nutrient applications to meet the growing and changing needs of the crop? Could you develop a data set over multiple years from your tissue tests, that would guide your fertility decisions, help you ensure you have adequate nutrients available during key growth stages?
Good solid foundational fertility programs are essential to maximizing productivity, but if we look at the basis of many fertility recommendations, they are based on fertility programs and recommendations that were developed many years ago with different genetics, different farming practices, different cropping systems, etc.
As a grower today, your “on farm efficiency” is so much greater than 25-30 years ago. In the past we slug fed fertility to grow crops. Today, input costs do not give us that liberty. Growers today do a much more efficient job of growing crops by utilizing nitrogen stabilizers, precision application, precision placement, and targeting nutrients during critical growth stages. According to data available from the USDA and the Fertilizer Institute, the total (lbs on the ground applied) of fertilizer used today in American agriculture is not that much different than 1980.
“What’s holding you back from higher yields?” Is some element of your fertility program limiting your effort to improve yields? Much emphasis is placed on the N, P, K, soil pH etc. within fertility recommendations. However, if you start to ask your soil lab questions about secondary and micro-nutrients needed to grow 300 bu corn, they often don’t have an answer. Try sending a soil test to the lab, and ask them for recommendations for 250 bu corn and then ask them to give you recommendations from the same soil test for 300 bu corn. For some labs, the only change they will make to their recommendations will be Nitrogen recommendations. Does the lack of recommendations focused on the other elements of fertility hold back yields?
When we understand some of the fundamentals to agronomy, such as “Corn needs 1 unit of nitrogen to grow a bushel of corn” and “For every 8 units of Nitrogen applied you need 1 unit of Sulfur” or “For every 9 parts of Phosphorus applied you need 1 part Zinc,” you might ask yourself, “Why aren’t the recommendations for secondary and micro-nutrients changing when we attempt to achieve higher yields? Are they limiting factors in your fertility program?
Many times, the answer to finding higher yields and increasing on farm profitability is found by asking the right questions. Keep asking questions until you uncover the roadblock that limits your ability to increase your yields.
The time for Nitrogen application is upon us, and in some areas the first nitrogen application has already been applied with the support of nitrogen stabilizers. The wheat plant’s greatest need for Nitrogen begins around feekes stage 6, which is when the first node forms at the base of the main stem. Once that stem begins to elongate, the plant begins to uptake a lot of Nitrogen. Feekes stage 6 usually occurs in early to mid-April here in PA. Split applying Nitrogen, to time the application of nitrogen to critical growth stages, may be the most effective way to maximize overall yield and productivity.

Let’s take a look at a few other key elements to high yield wheat, such as Potash, Sulfur, and Boron.
Potash
Potassium is very important because of its impact on the process of photosynthesis, whereby the plant utilizes energy from the sunlight to convert carbon dioxide into carbohydrates to feed the plant. Potassium increases the chlorophyll and protein formation within the plant and assists in moving sugars through the plant to feed the new cell growth that is happening in the plant. Potassium also increases stalk health and strength, improving stand-ability of the wheat crop.
Cold, dry soils or soils high in Calcium or Magnesium may decrease the availability of potassium to the plant. High Nitrogen rates also reduce the ability of the plant to uptake Potash simply because the Nitrogen is more readily available and clogs up the vascular system of the plant limiting the flow of Potassium into the plant. We frequently recommend spiking your Nitrogen applications with Potassium or foliar applying some Potassium to help maximize the uptake of Potash into the plant.
Sulfur
Sulfur is another element that is important for protein and chlorophyll synthesis. Sulfur brings out the dark green color in the plant due to its impact on chlorophyll production. Sulfur helps the plant fight off disease, helps to influence test weights, and generally contributes to overall yield increases by developing a healthier more robust plant that can support higher yields.
Boron
Boron is sometimes the forgotten ingredient in wheat production. Boron is a vital component of plant growth, because of the role it plays in forming and building cell walls. Boron is needed at the growth point of the plant, where cell division and new cell formation is developing. Boron helps transfer nutrients like sugars and carbohydrates to the new cells that are forming. An inadequate supply of Boron to the plant can retard the growth of fast growing tissue, impacting plant development. Boron can help the plant during flower set, pollination, and kernel formation, allowing the plant to express more of it’s genetic potential.
Boron does not re-mobilize in the plant, which means it doesn’t move from old growth into new growth. Therefore, the plant needs an adequate supply of Boron through early growth stages into the grain fill period. Also, its important to remember that soil pH above 6.5 ties up the availability of Boron to the plant.
Plants do not need high amounts of Boron, but it is important to keep this key element available because Boron also has an impact on the uptake and transportation of Potassium within the plant.
Boron deficiency is most often expressed at the growing point of the plant. You may see underdeveloped new leaves, or you may see saw tooth leaf edges or a crinkling pattern on the leaf, or even plant cell death at the growing point of the plant, which is indicated by brown necrotic leaf edges.
Wheat growers are anxiously watching the weather patterns this spring. Having just experienced a warmer than normal February, the question is, what will March and April bring. With the unseasonably warm February, wheat started to green up and break dormancy earlier than normal.
While scouting small grain fields across portions of PA, I have noticed many small grain fields look uneven, and in some areas we have noticed significant winter kill, which is a result of excessive freezing and thawing over the past few months. Since we didn’t have a deep freeze, and we had a lot of temperature swings, the freeze thaw activity has jacked the crowns up out of the soil and exposed the roots. In areas where the soils have been dry, the roots are drying out and as a result we are seeing some plant death and stand loss.
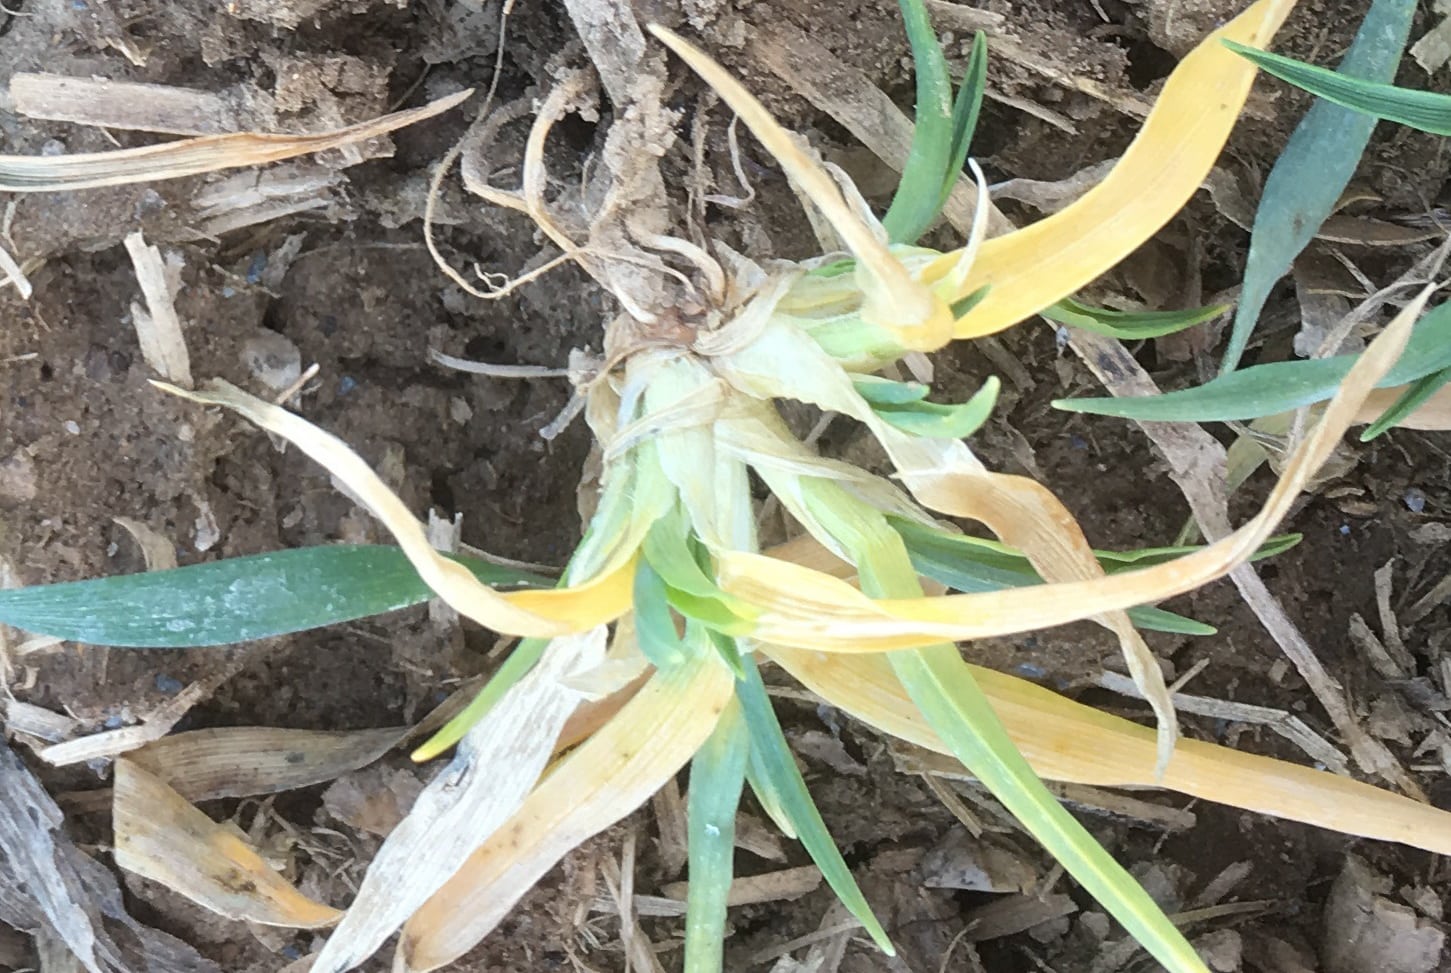
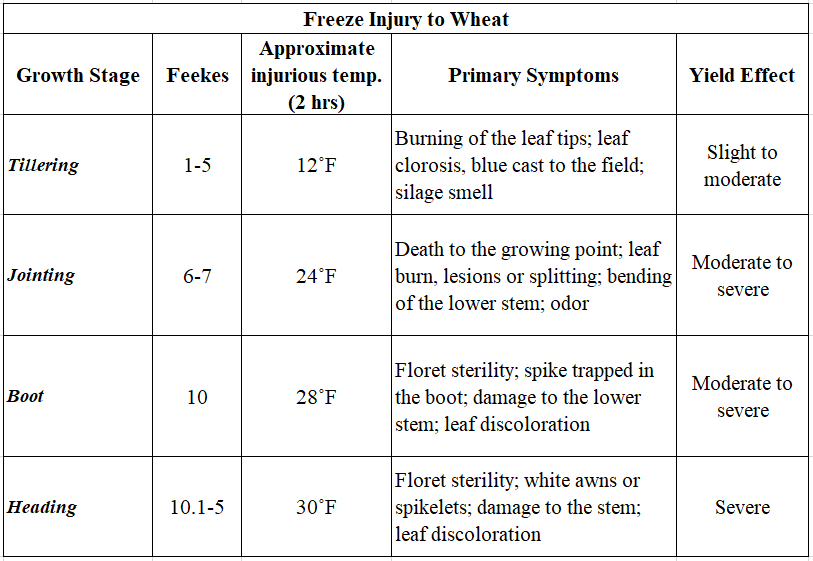
The next question I am already getting is, “How much should we be concerned about cold temps over the next 60 days?”
Below is a chart that shows stages of growth and the temperatures at which the wheat crop could be at risk.
As the soil temps begin to rise and alfalfa comes out of dormancy, it’s a great time to take a walk and evaluate your alfalfa stands. High yields start with thick healthy stands. One-year-old stands should have 12-25 plants per square foot, two-year-old stands 8-12 plants per square foot, and 3+ year old stands should have a minimum of 5 plants per square foot, to maximize yields. Another way you can evaluate your stand is to do stem counts when the alfalfa is 4″ to 6″ in height. Stem counts above 55 per square foot, will allow you to achieve maximum yields. Once the stem count drops below 40 per square foot, it is time to rotate out of alfalfa.
View of green lucerne field under blue sky
As you walk your fields, take a moment to observe root and shoot health. Dig up a few crowns and slice open the tap root. Look to see if the inside of the root is creamy white. Off colored roots may indicate the presence of disease. Heavy wheel traffic can crush or split crowns, leaving them susceptible to disease or decay which will shorten stand life.
A good fertility program for alfalfa starts with maintaining a soil pH between 6.5 and 7.0. A soil pH above 7.0 may cause some micronutrient shortages to occur. Alfalfa requires a lot of Potassium to maximize yields. For every ton of dry forage you harvest, you remove 60-70 lbs of potash from the field, making it necessary to provide ample potash levels to the soil in support of high yields throughout the life of the stand. Excessively high potash levels within the soil can reduce the availability of some key micronutrients like Zinc, Copper, and Manganese. Phosphorus is also an important element for alfalfa. Each ton of dry hay removes 12-15 lbs of phosphorus from the soil. It is important to remember if soil pH drops below 6.5, that reduces the amount of phosphorus that is available to the alfalfa plant.
Calcium, Magnesium, and Sulfur are secondary nutrients that are also very important in alfalfa production. Most times the amount of lime needed to maintain the required pH gives us the amount of calcium needed for optimum yields. Magnesium also correlates to soil pH; however, in low CEC soils, Magnesium availability may be limited. Magnesium helps to carry nutrients within the plant like, potassium, sugars, and starch. Magnesium is also critical for chlorophyll and enzyme production within the plant. Alfalfa uses about 30 lbs of elemental Sulfur per season, much of it coming from the soil structure. Sulfur is a catalyst to chlorophyll production and is a structural component to protein formation. With less Sulfur being deposited by industrial sources, Sulfur is an element we need to monitor more closely.
Boron is widely recognized as a critical micronutrient in alfalfa production. Compounding the Boron issue, is the fact that soil pH above 6.5 ties up the boron, making it less available to the plant. Boron is also highly soluble and mobile within the soil. High organic matter soils help to hold the nutrient longer. Growers have resolved these issues over the years by making foliar applications of products like BORPOWER multiple times throughout the growing season. Alfalfa needs 2-3 lbs of elemental boron per growing season, some of which is pulled from the soil.
ALFAPOWER MP is a product formulated to meet the micronutrient needs in alfalfa production like Copper, Manganese, and Zinc. Copper improves the respiration within the plant. Manganese improves the assimilation of carbon dioxide and nitrates into the plant, helping to produce chlorophyll and protein. Zinc stimulates the production of auxins within the plant, acting as a growth promoter. Zinc also regulates the flow of sugars to the growing point of the plant.
As you look for ways to improve your alfalfa yields, it’s always important to maintain a proper balance in soil fertility. Start strong by building a good fertility base prior to stand establishment, and then feed the crop to maximize productivity, throughout the life of the stand.
Now that corn has begun to emerge, it’s a great time to scout and observe what may be creeping through your fields. Each year is different, and the weather patterns that we have encountered since the past growing season may have some impact on the level of pest pressures we find. I’ve been watching closely the reports from various universities in our region and beyond, and for the most part they are indicating significant pest pressures across various crops, which is what we would expect based on the relatively mild temperatures we experienced over the winter months.

Minas Gerais, Brazil, November 17, 2009. Undefined farmer walking on corn field, in Minas Gerais State, Brazil
Black Cutworm (BCW) -This pest doesn’t usually overwinter in our region, but earlier this spring, growers, and entomologists reported seeing large larvae feeding in wheat and other species, which indicates the mildness of the past winter. BCW most often arrive with the spring storms and lay their eggs into decaying green tissue. Fields most likely to have high populations are those fields that had heavy winter annual weed pressure or cover crops. Once the egg is laid, the larvae will emerge after 300 Growing Degree Days have accumulated. Populations of the moth flights have been high in multiple areas this spring, so be prepared to scout and protect your new seedlings, as feeding has now begun.
Corn Root Worm (CRW) – The CRW overwinter as eggs in the soil. These eggs may be anywhere from just below the surface to several inches deep in the soil. Harsh, cold winters usually have little impact on the survival of the eggs. CRW in our region is primarily a problem in corn on corn acres. It generally takes 2-3 yrs of corn on corn for the CRW populations to expand to the point they reach an economic threshold. CRW has mostly been controlled either by using an in-furrow insecticide or by using transgenic traits.
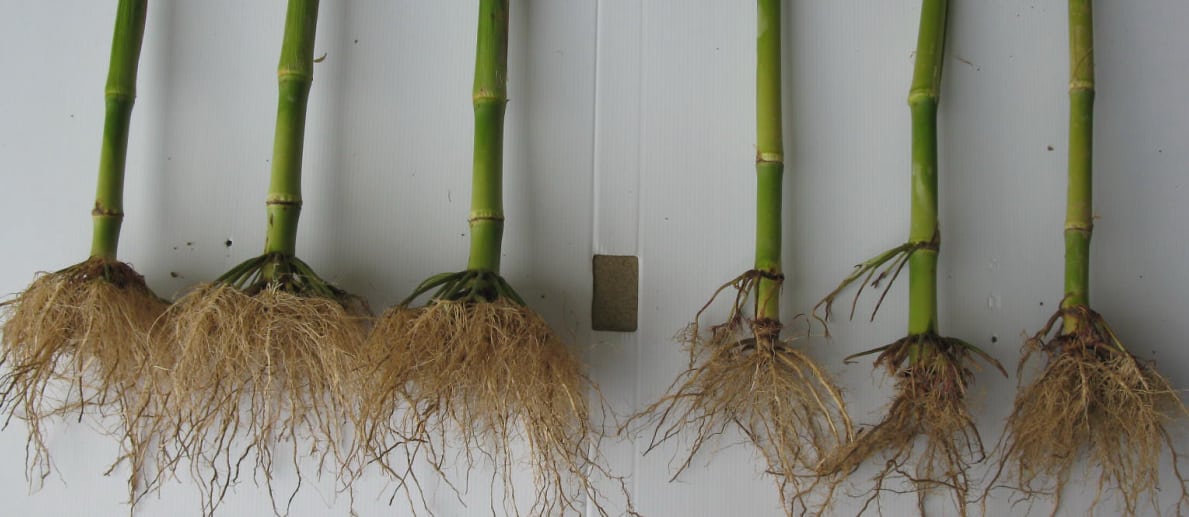
There has been an increase in trait failures over the past few seasons, and there are ways we can manage differently to reduce the chance of trait failure on each farm. Here are a few tips that can reduce the chance of trait failure.
- CRW traits, regardless of trait provider, only control the CRW larvae during the 1st instar stage of development. CRW traits are considered low dose events. This is very important to remember, because it sets up the following points.
- Weed control, particularly grass control is vital. Did you remember that corn is a grass species? Did you know that the CRW larvae will eat any grass root, not just corn? If you have grasses or cover crops containing grass species such as cereal grains, you’ve just set the table for the CRW larvae. If the CRW larvae have a food source and are developed beyond the 1st instar, and then you take that food source away by applying a herbicide, the CRW larvae will then move to feed on the corn roots. If the larvae are developed beyond the 1st instar, the CRW transgenic trait will not have a high enough dosage to knock them dead, and you may experience root feeding. In this situation, it is not a trait resistance issue, it’s a management issue that can be remedied. I’ve seen this situation multiple times over the past few years.
- Planting date also is important in managing transgenic traits. CRW eggs hatch based on heat units, Delayed planting or late planted corn will be the most susceptible to trait failure. If the crop is planted in a scenario where the CRW larvae have developed beyond the 1st instar stage of growth, the CRW transgenic trait dosage will be unable to control the pest. Other methods of CRW control, such as insecticides are best deployed to manage CRW pressures in delayed planting situations.
- Use multi-stacked traits. Know what trait versions you are using. Having more than one mode of action against the CRW pest, can help manage against any potential resistance issues. Don’t plant the same trait package in the same field year after year. Most seed companies have access to multiple trait providers and rotating your CRW options is a good risk management tool.
- Crop rotation is the best pest management tool. Just remember that rotating corn to cereal grains and then back to corn is not sufficient to manage CRW resistance because you are not changing crop species. Rotate to soybeans or alfalfa or some other non-grass species to manage the CRW populations.
European Corn Bore (ECB) – These pests often overwinter as larvae and reside in the corn or weed residue. ECB are usually not affected by the variation of temperatures, but can be impacted otherwise. Mild, wet springs can make the larvae susceptible to a disease pathogen that may kill off some of the populations. Other factors like fall stalk chopping or fall tillage can a reduce ECB populations. ECB moths often move from field to field or across town to lay their eggs, and successive generations occur in a single season. 1st generation ECB tunnel thru the lower part of the stalk, weakening the stalk and providing and entry point for various pathogens to infect the plant. Common stalk bore can sometimes be mistaken for ECB, and is not controlled by all transgenic trait versions. Non-traited acres are often under heavy pressure and should be scouted and monitored.
Managing insects, weeds and monitoring your fertility sets you up for a good crop year, so invest the time to see what’s happening in your fields.
It’s time for the mid-year review. What does your performance look like? As you evaluate your crop and review the management decisions you’ve made, here are a few things you might want to look for as you are out standing in your fields.
Ear Counts vs Stand Counts
Uniform emergence is critical to uniform ear size and placement.You fine-tuned your planter, and made every effort to establish a picket fence stand, but is that what you got?
The planting season and early spring weather made it difficult to establish optimal stands in 2017. Along with the difficult weather patterns, many growers were challenged with slug feeding and other factors that contributed to erratic stands. So, as you walk your fields, you likely will find some small ears or undeveloped ears that indicate uneven emergence or slug feeding early on. Your planter may have performed just fine, but you were overruled by other factors.
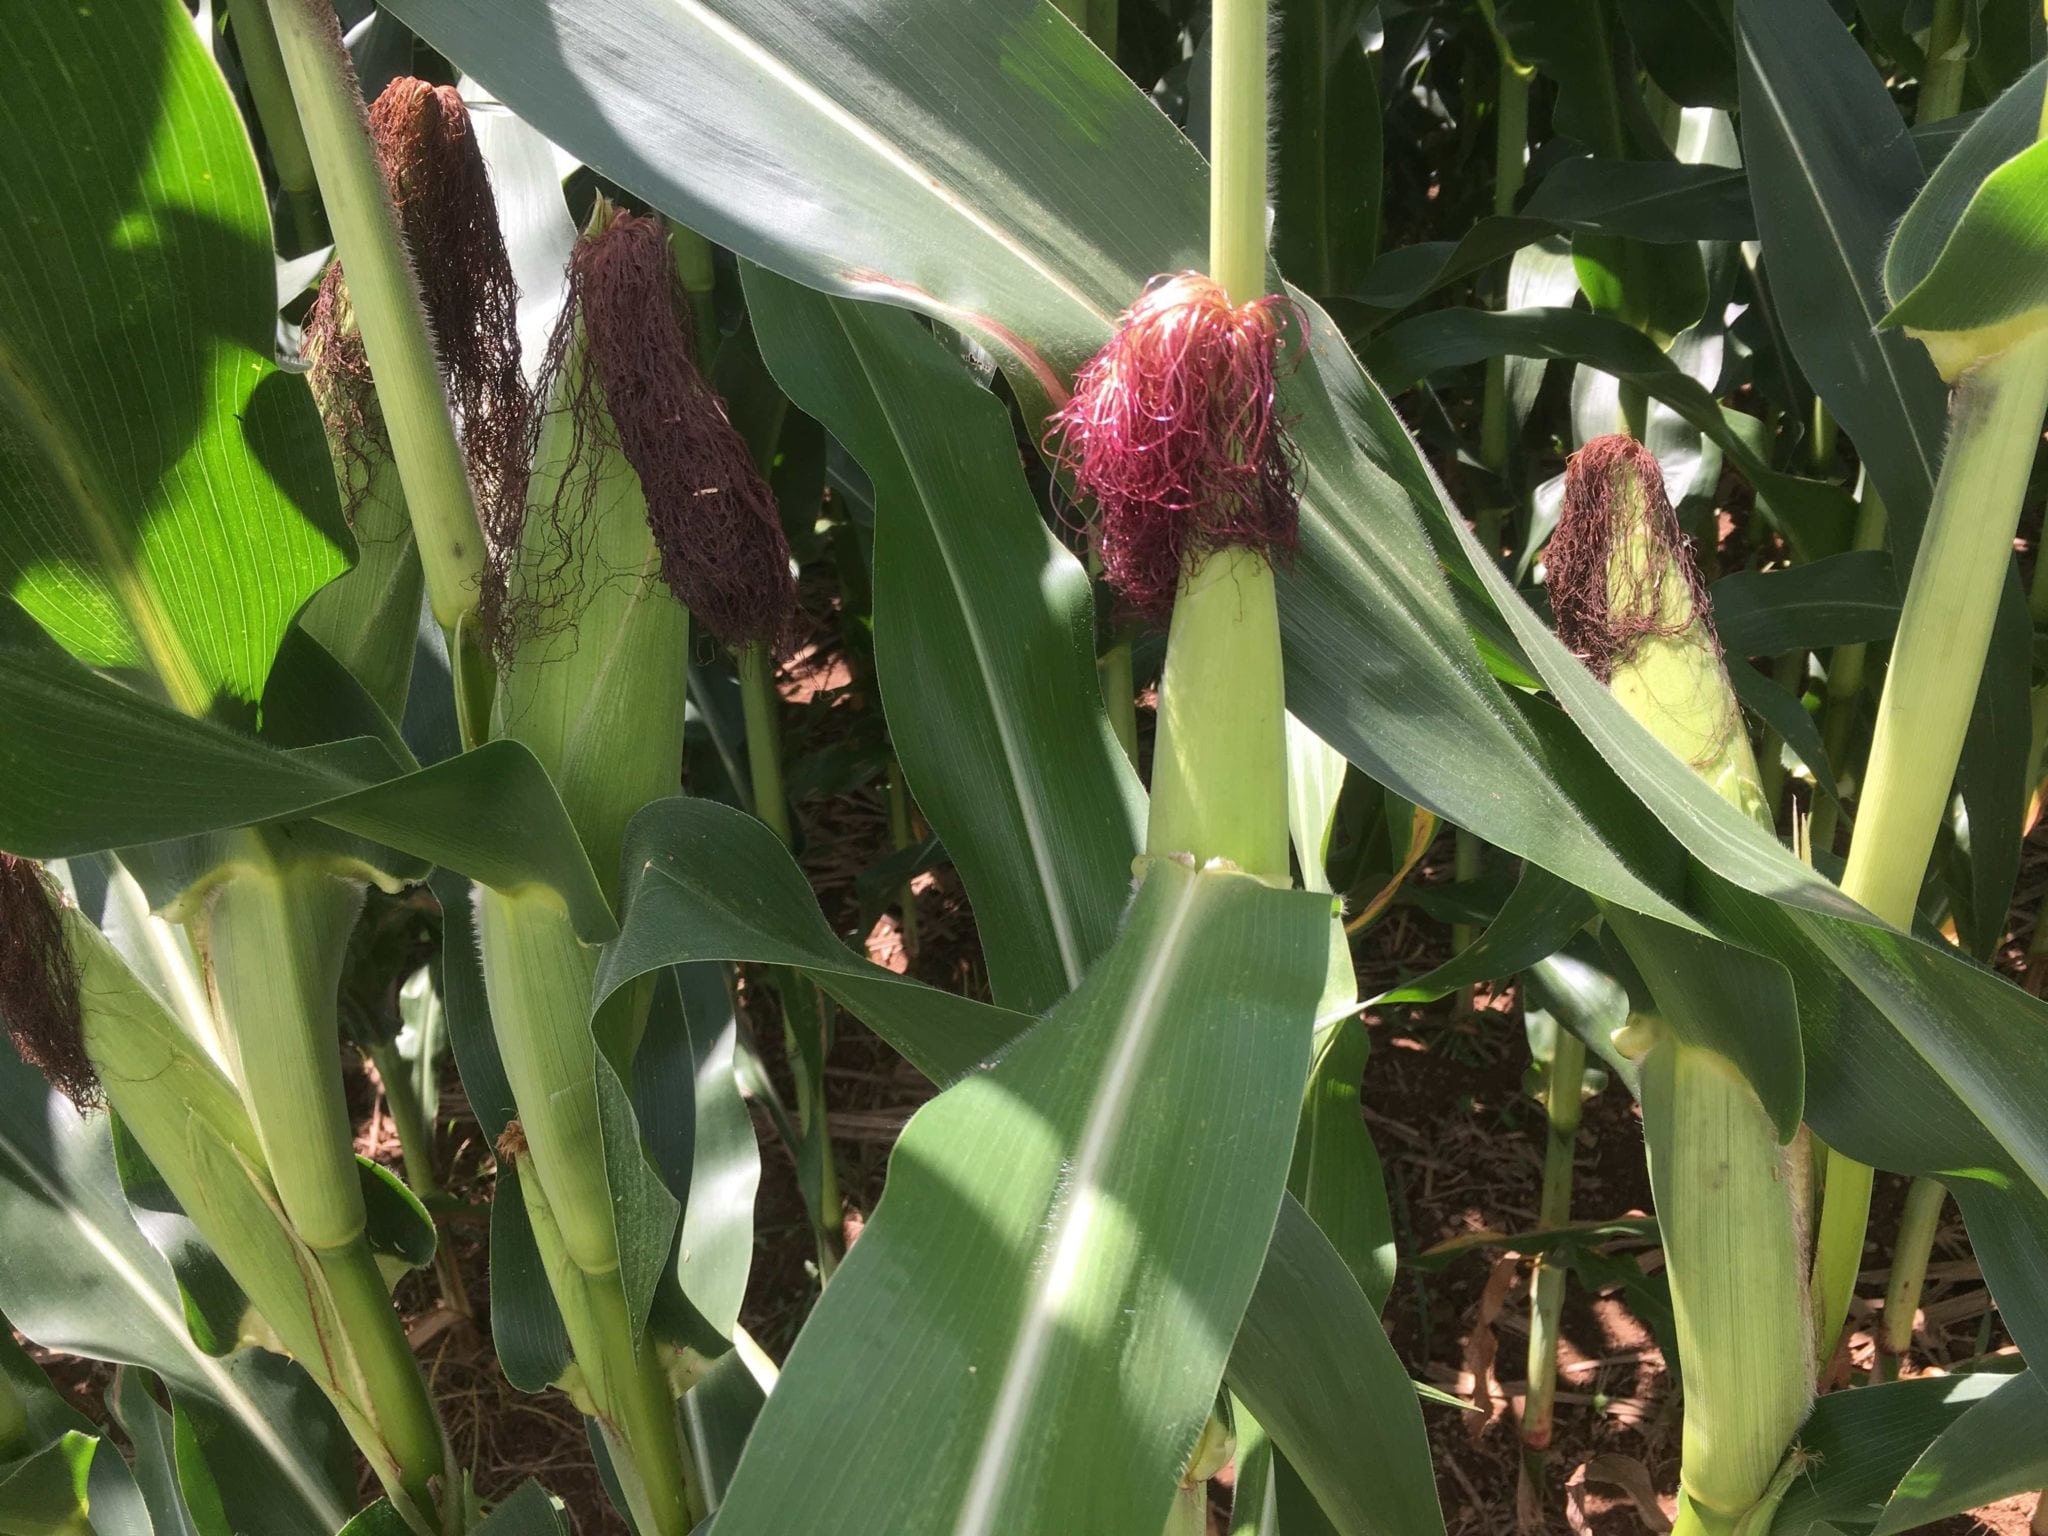
Root Zone Issues
Take a shovel along and look below the surface. Any sign of limited root growth can indicate tight or compacted soils. Limited root growth will also affect the plants ability to extract nutrients from the soil. Healthy roots are white and grow at a 45-degree angle. Twisted, kinky looking roots indicate tight soil. How deep are your roots penetrating? How deep was you seeding depth? Are your brace roots at or above the soil line? Ideally, you want your planting depth to be deep enough that the brace roots are expressed at the soil line, anchoring the plant and pulling up nutrients.
Fertility
Look for symptoms of deficiency
Nitrogen – Summers like this where we have excessive rainfall events, put a lot of pressure on nitrogen management programs. Multiple applications of nitrogen timed to meet the demands of a maturing crop, prove very beneficial under these conditions. If you are not already using nitrogen stabilizers, consider using them in the future. Products like N-Ergize prevent the leaching and denitrification of the nitrate, enabling you to maximize yields.
We’re seeing quite a few locations where the crop has run short of nitrogen early in the grain-fill period, and this will have an impact on yield.
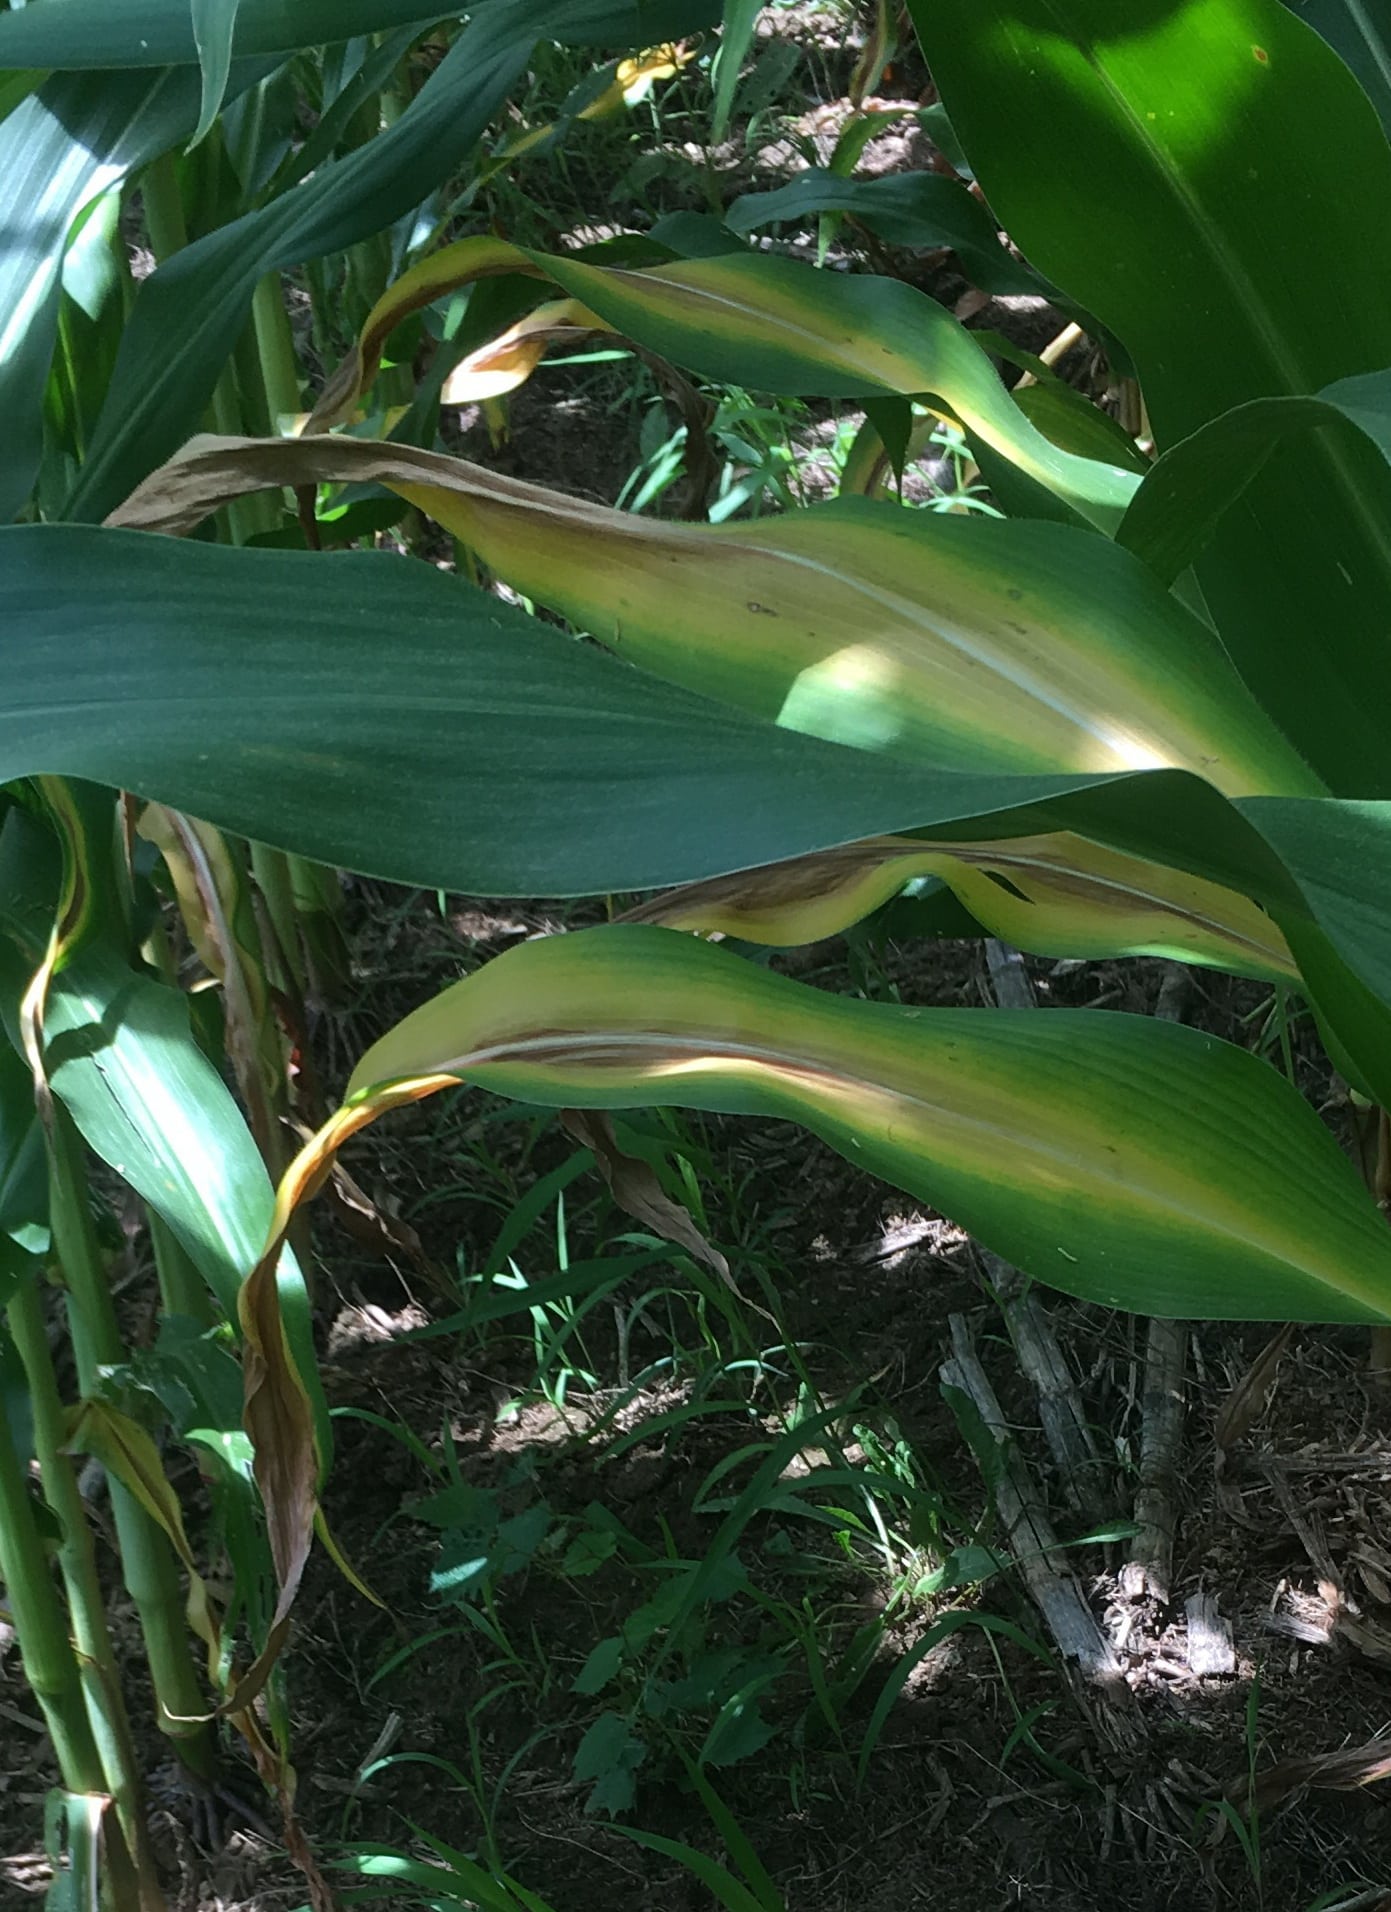
Potash Levels
Potash shortages continue to be a challenge across much of the Mid-Atlantic region. We’ve had excellent yields over the past 5 years or so, and many growers are removing more potash than they are re-applying, which depletes the soil bank of this very important nutrient. Test your soils and carefully evaluate your crop to keep potash levels in balance.
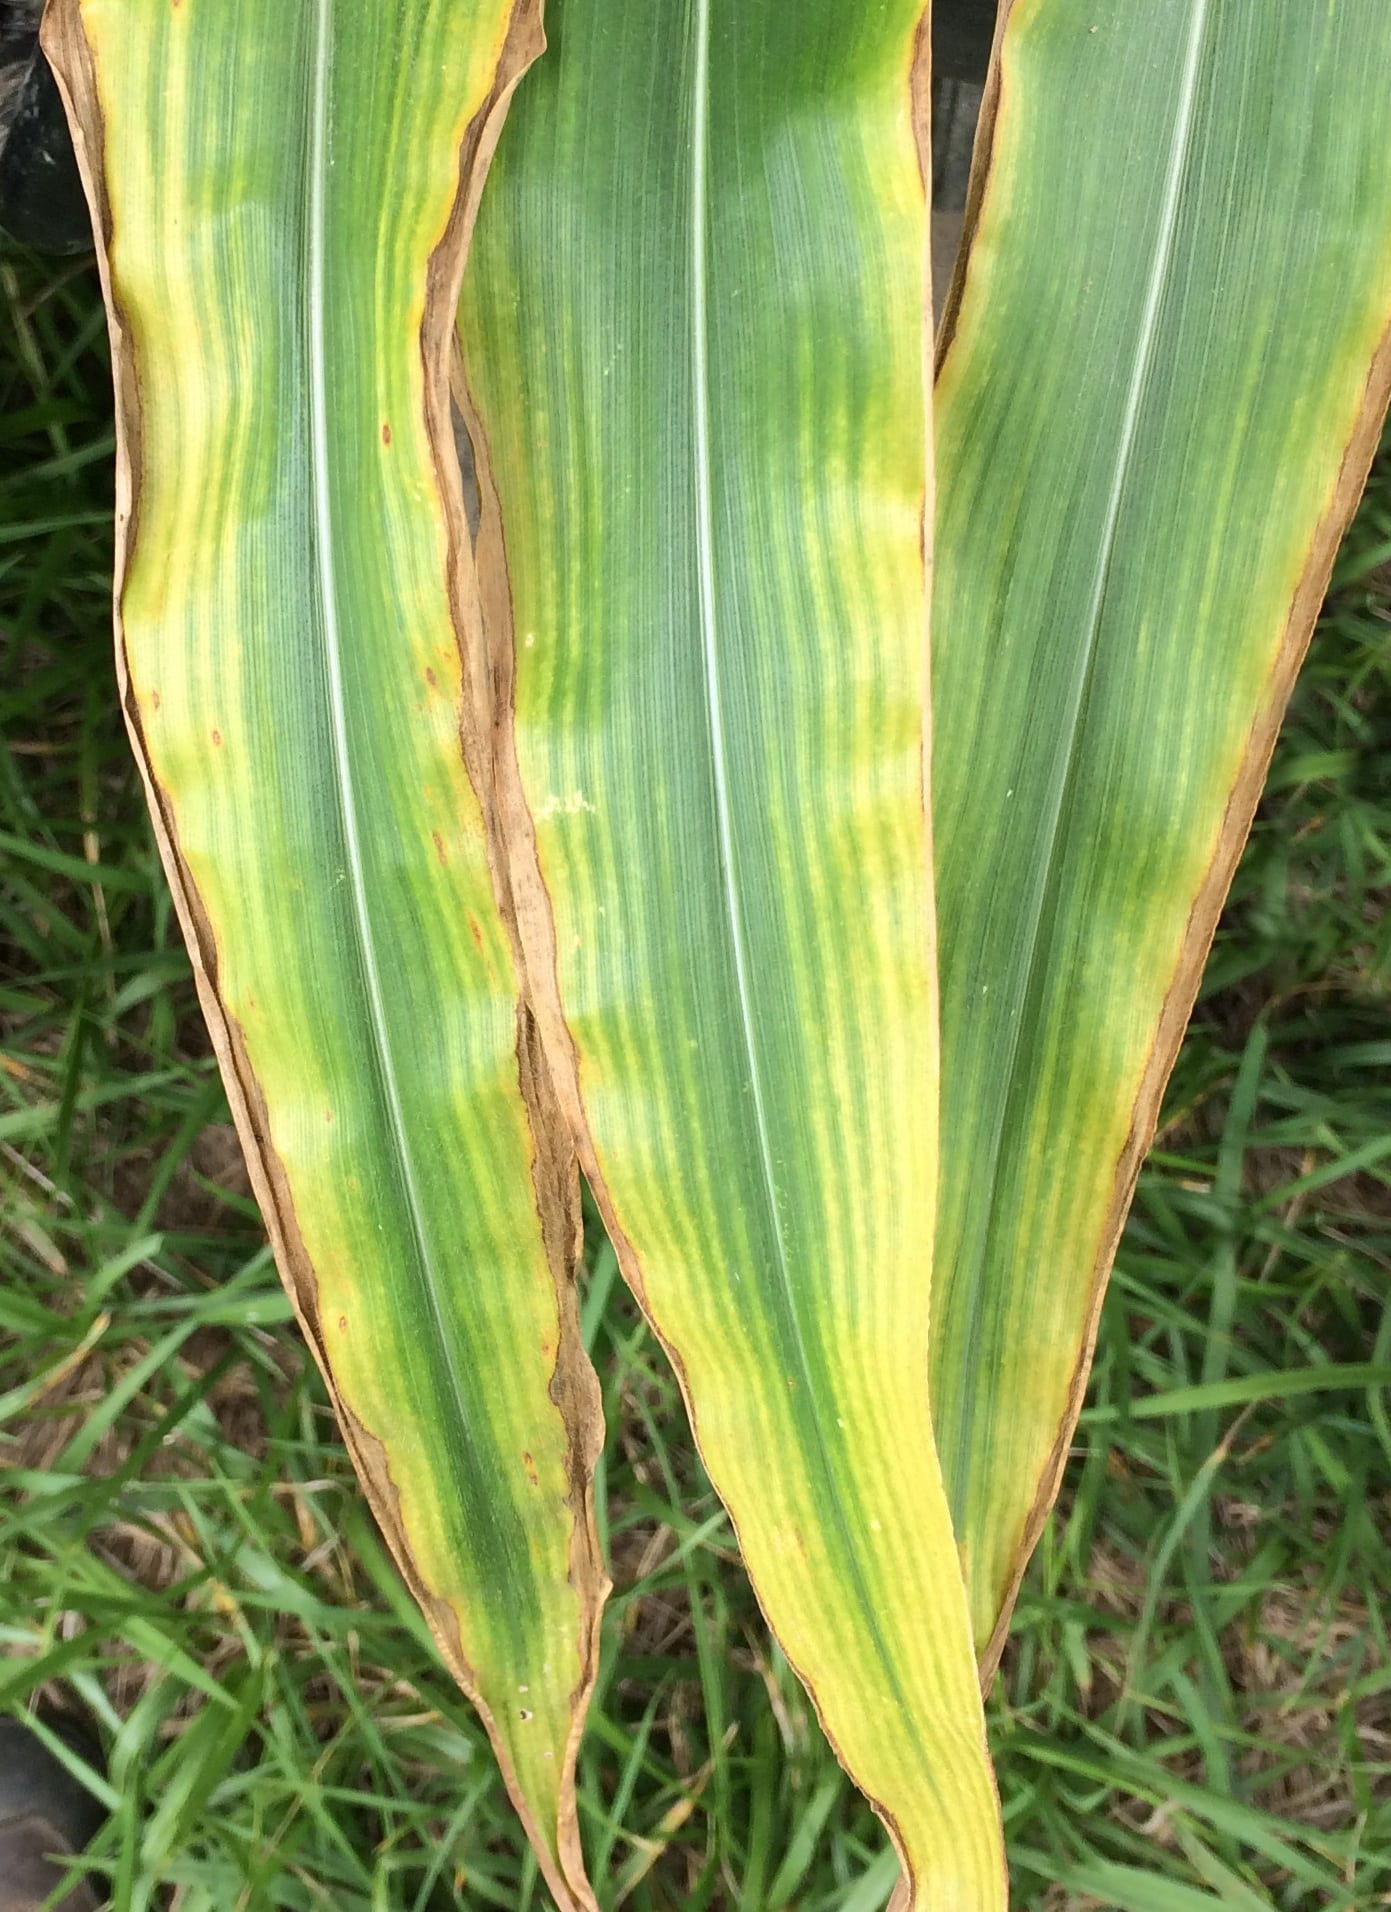
Insects
Look for Japanese beetles, Corn Root worm beetles, Fall Army worm, Corn Ear worm, and stalk bore. A few quick things to look out for – Have the silks been pruned? If so, do you see any jap beetles or corn root worm beetles around? Did silk feeding affect pollination?
Even if you are using BT traits to control corn rootworms, most of those traits do not control the hatch of the corn rootworm beetles, which feed on silks and pollen. If you find multiple rootworm beetles per plant, you should consider using additional rootworm protection the following year in corn or rotate to another crop species. Also, if you have a heavy infestation of jap beetles, they will lay their eggs and become white grubs that feed on roots the following spring. So, mark those fields and take necessary precautions to protect the crop the next season.
Pollination & Tip Fill
Pollination issues can stem from multiple issues, such as insect feeding, excessive heat stress, excessive rain.
Pollination starts at the butt of the ear and extends out toward the tip. Sometimes you’ll see one end that has been affected, sometimes the whole ear. At times you will see long silks hanging off the ear, which indicates there was stress during the pollination window. Hot temperatures will retard the expression of pollen, while the silks will continue to grow around 1.5″ per day. Once pollination is completed, the silks will change color, and eventually turn brown and crispy. Here is a link that shows you how to determine when pollination is complete.
Tip fill can be influenced by multiple factors such as fertility, moisture stress, heat stress, etc. As the corn plant matures and fills the ear, the ear will pull all the nutrients possible to build yield. If the plant is unable to extract enough nutrients from the soil, it will cannibalize itself and pull all the nutrients that are stored in the leaves and stalk to support yield, but this comes with a penalty. You may see tip back, you may see reduced test weight, you may also experience more lodging issues if the stalk has been compromised.
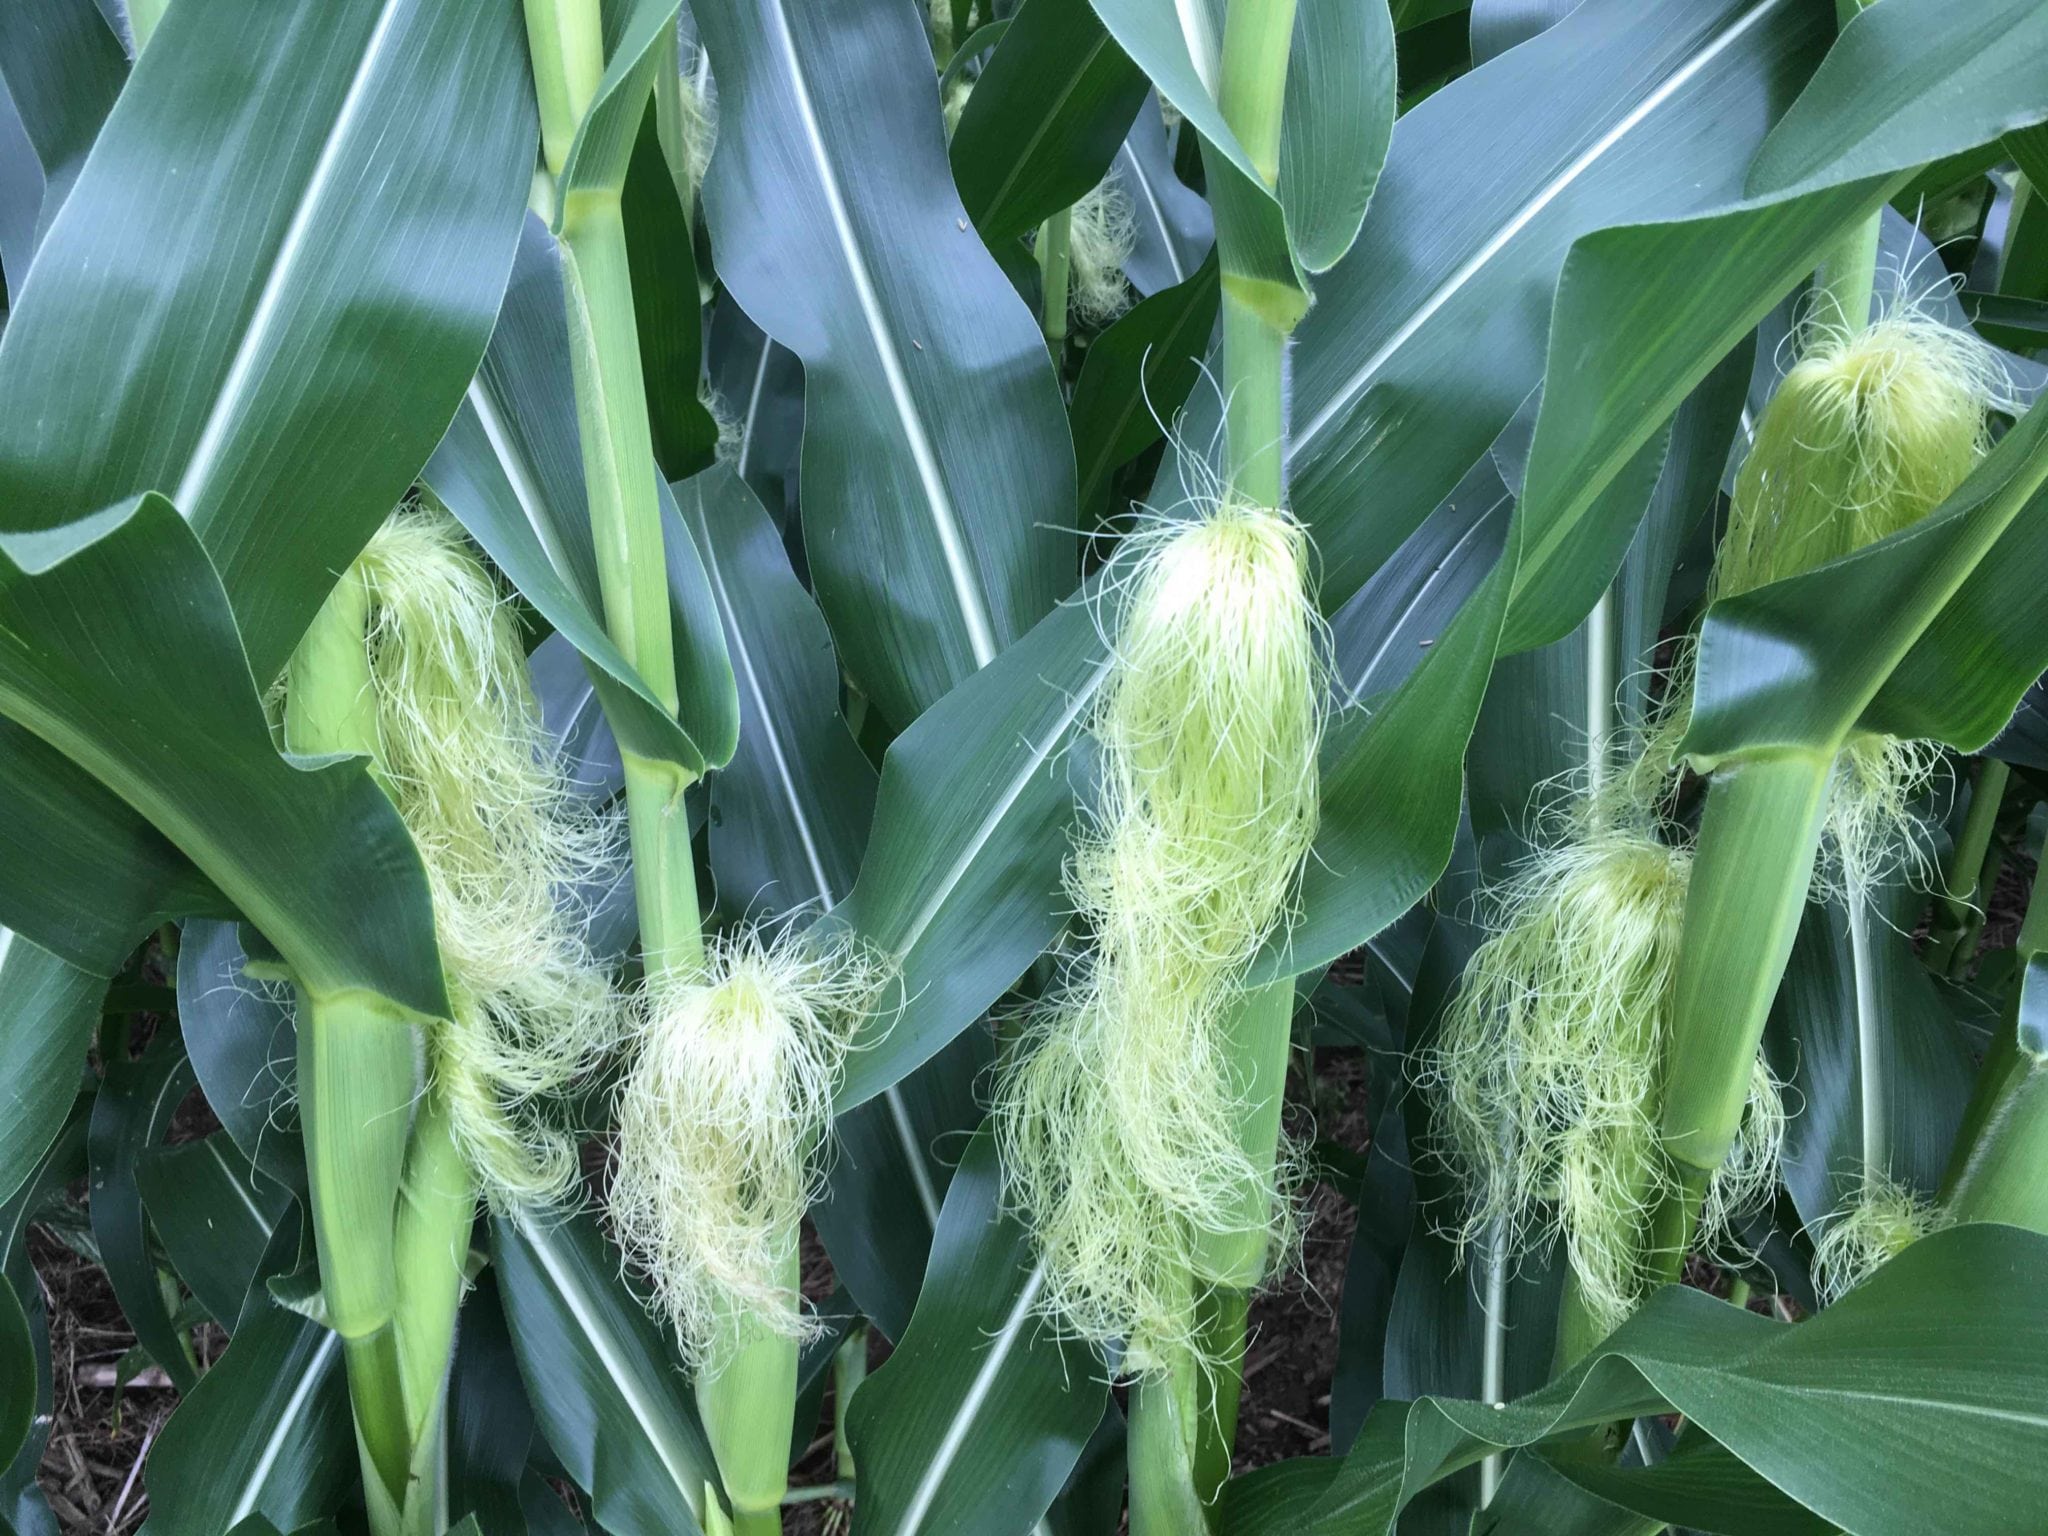
How much did the recent cooler than normal weather pattern impact the 2017 crop?
Data from my local weather station shows us we had only one day above 90 degrees during the month of August. Even though we entered the month of August, ahead YTD for Growing Degree Days (GDD’s), that lack of heat in August and into September, has significantly delayed the maturity of the crop.

The secondary factor in the delay of maturity, may have been overlooked. Low night time temperatures had an impact. Growing conditions like we’ve seen this summer are infrequent enough that there is still much debate about the full impact of night time temperatures in the 40’s and 50’s during grain fill. The last season we had a similar growing pattern was 2009. In 2009, we saw a similar growing season, a warmer than normal March-April, followed by cooler, damp conditions for much of the summer, and then a lot of cool nights toward the end of the growing season.
Canadian researchers, a few years back, documented that the rate of photosynthesis declines sharply, as much as 30%, following nighttime temperatures in the 40’s and low 50’s. Multiple nights in a row may also compound that effect. The photosynthesis process is critical to building yield as it converts sugars into starch and grain fill. The cold night temperatures seem to make the plant sluggish, and it takes bright, sunny, warm days to snap the plant back into full productivity. As you look back over the past 30 days, we have had cool temperatures, followed by a significant amount of cloudy days. So, to wrap it all in a nutshell, the lack of GDD’s in August and September, compounded with cloudy skies and cool nighttime temperatures, has compounded the delay in maturity and harvest.
Once corn reaches physiological maturity, black layer, you can track GDD’s to estimate the time of harvest. Generally we figure it takes 150 GDD’s to drop the grain moisture from 30% down to 25%, and it takes another 40-45 GDD’s to extract each point of moisture below 25%. So far, here in the month of September, we are accumulating around 13-15 GDD’s each day.
One of the benefits of slower GDD accumulation like we had this year, is the lack of heat stress on the crop, and the extended grain fill period that comes with a delay in maturity. Often the combination of these two factors contribute to longer, larger kernels that build more yield. We have been blessed with a very good crop this year.
Soybeans are not affected as much by heat unit accumulation, since they are a light sensitive crop. As you look at the soybean crop, we grew a lot of foliage early in the growing season, but have lacked the bright sunny skies needed to maximize productivity. Flowering, pod set, and pod fill can all be impacted by the amount of sunlight the crop receives during critical stages of growth. As the soybean crop nears maturity, bright sunny days will help the plant produce larger fruit, building more yield.
The importance of maximizing efficiency, effectiveness and economics in agriculture is always driving us to be better at what we do. The Streamline product is a tool that can help you do all three.
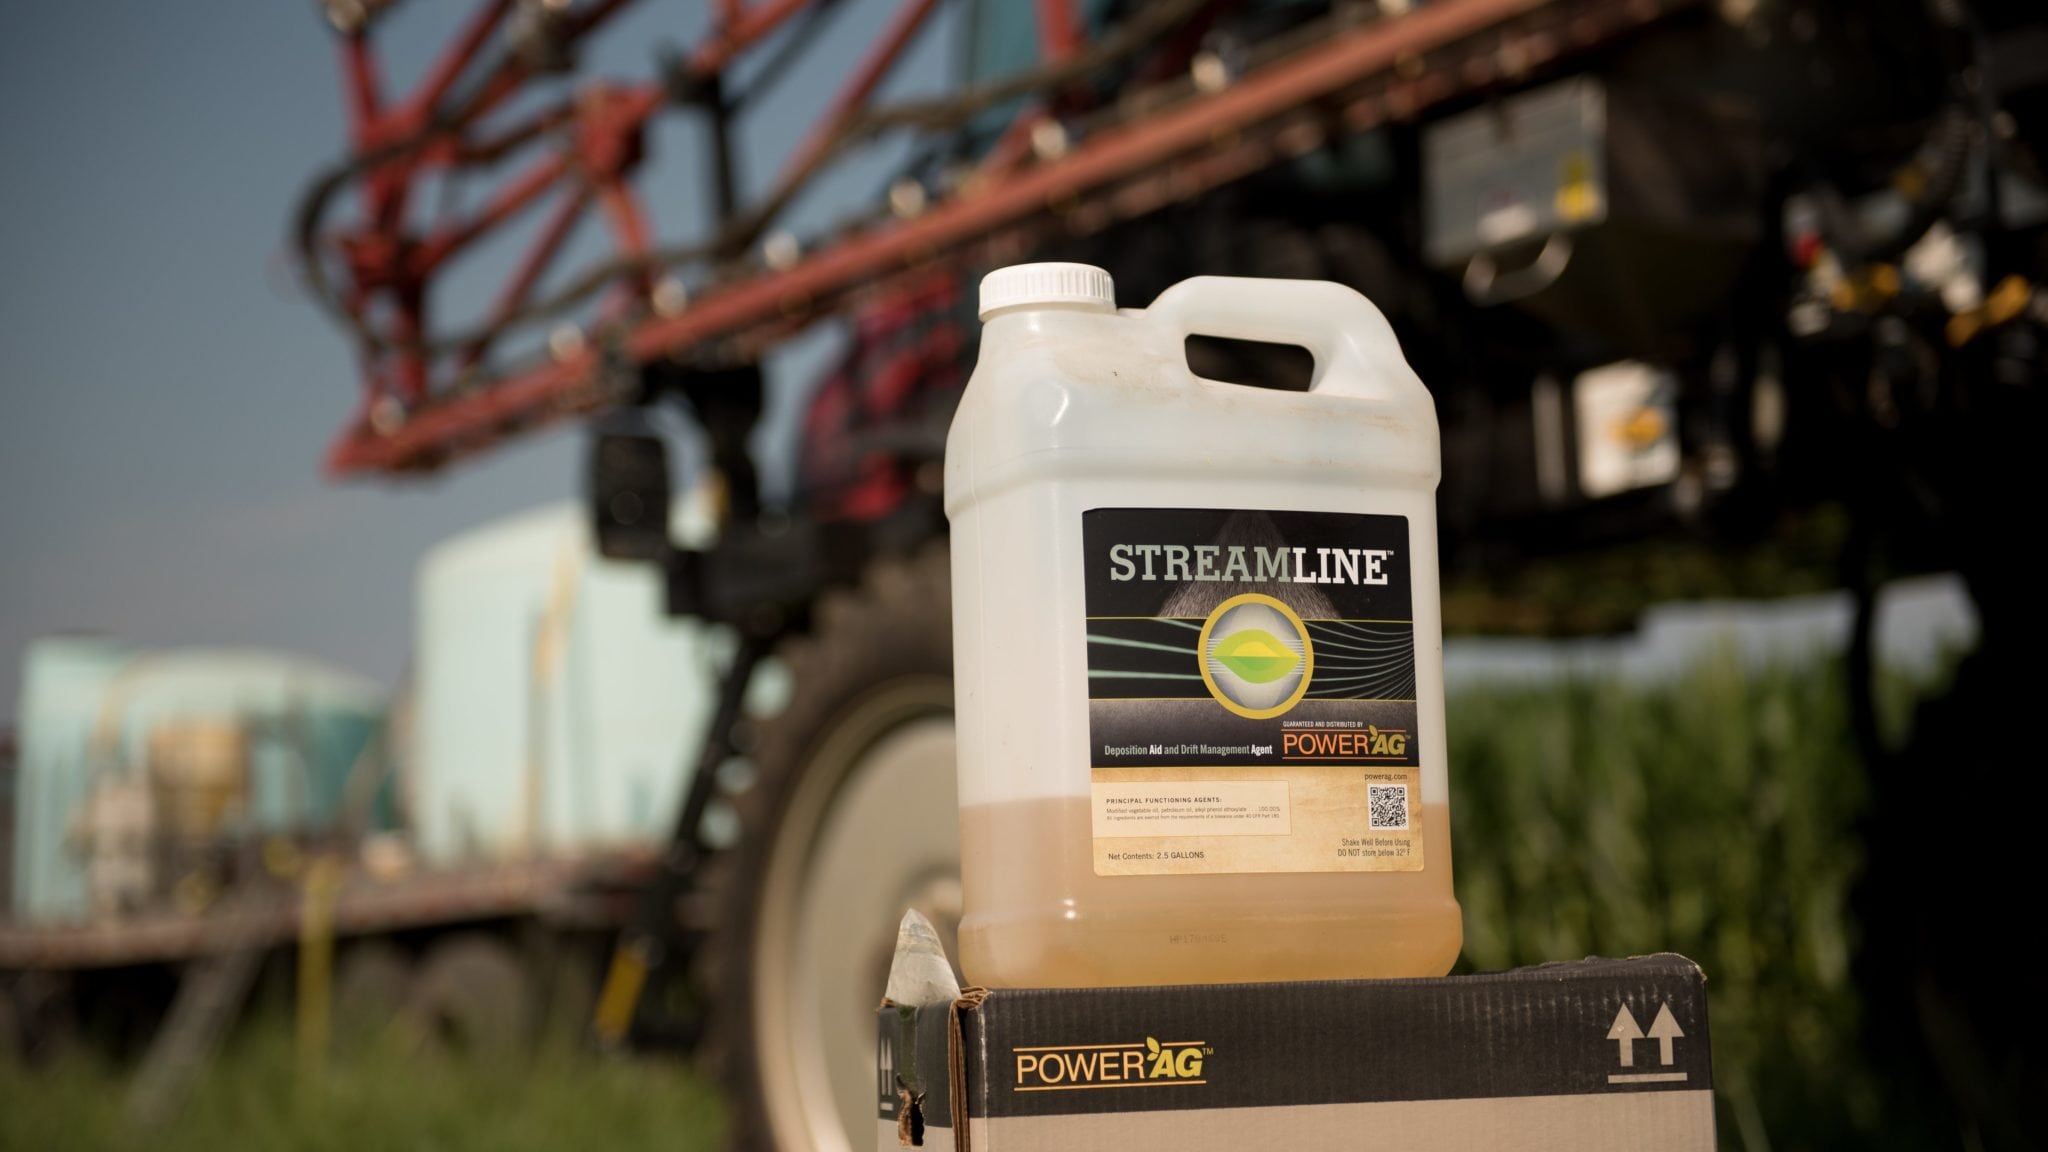
Streamline is an adjuvant that allows you to improve the efficiency of the chemistry you apply, by reducing the amount of small droplets in your spray pattern, while greatly reducing the possibility of off-target drift, and delivering more spray to your intended target.
Increased Effectiveness
Streamline also increases effectiveness, by improving the performance of the nozzles you select. By increasing the consistency of the droplet size, Streamline helps you penetrate deeper into the crop canopy, providing better coverage of the crop or the weeds. Penetration and coverage are very important in targeting tough-to-control weeds or when you are applying fungicides and overlaying a protective layer on the leaf surface to prevent disease infection.
Cost Effective
Streamline is a very cost-effective way to enable you to get the maximum return on your crop protection investment. Streamline reduces the amount of large droplets that may just bounce off the target during application. By increasing the amount of product that stays on the leaf, you improve overall product performance and ROI.
Easy To Use
Growers and applicators often comment on how easy Streamline is to use. It is a low use rate product and mixes well with herbicides, fungicides, insecticides, and fertilizers. Weather patterns are not always favorable for application, and the use of Streamline may keep you going in less than ideal circumstances.
Today we farm in an era where everything is under scrutiny, in our communities and beyond. Finding better ways to be good stewards of the land, is always on our minds, and helps all of us in the ag community.
The use of a product like Streamline, can help you to manage your crop protection applications, by reducing drift, getting more of the product being applied on target, and improving levels of control.
Click here to see a video from Robert Santini, about the importance of Streamline in his growing farm operation.
Is there such a thing as an ideal planting date? When is it? Are questions that often get asked by corn and soybean growers. There are many different factors that affect the answer to those questions, so let’s explore a few of those in this discussion.
First, we know from many years of research that there is a primary window of time, usually about 30 days, where we can maximize yields at or above 95% of yield potential for that growing season. The challenge is that you can’t just pick a day or week of the year and say that is always the best time to plant corn. Research also tells us, that if we push outside that primary planting window of time by more than 10-15 days, it will have a significant impact on yield.
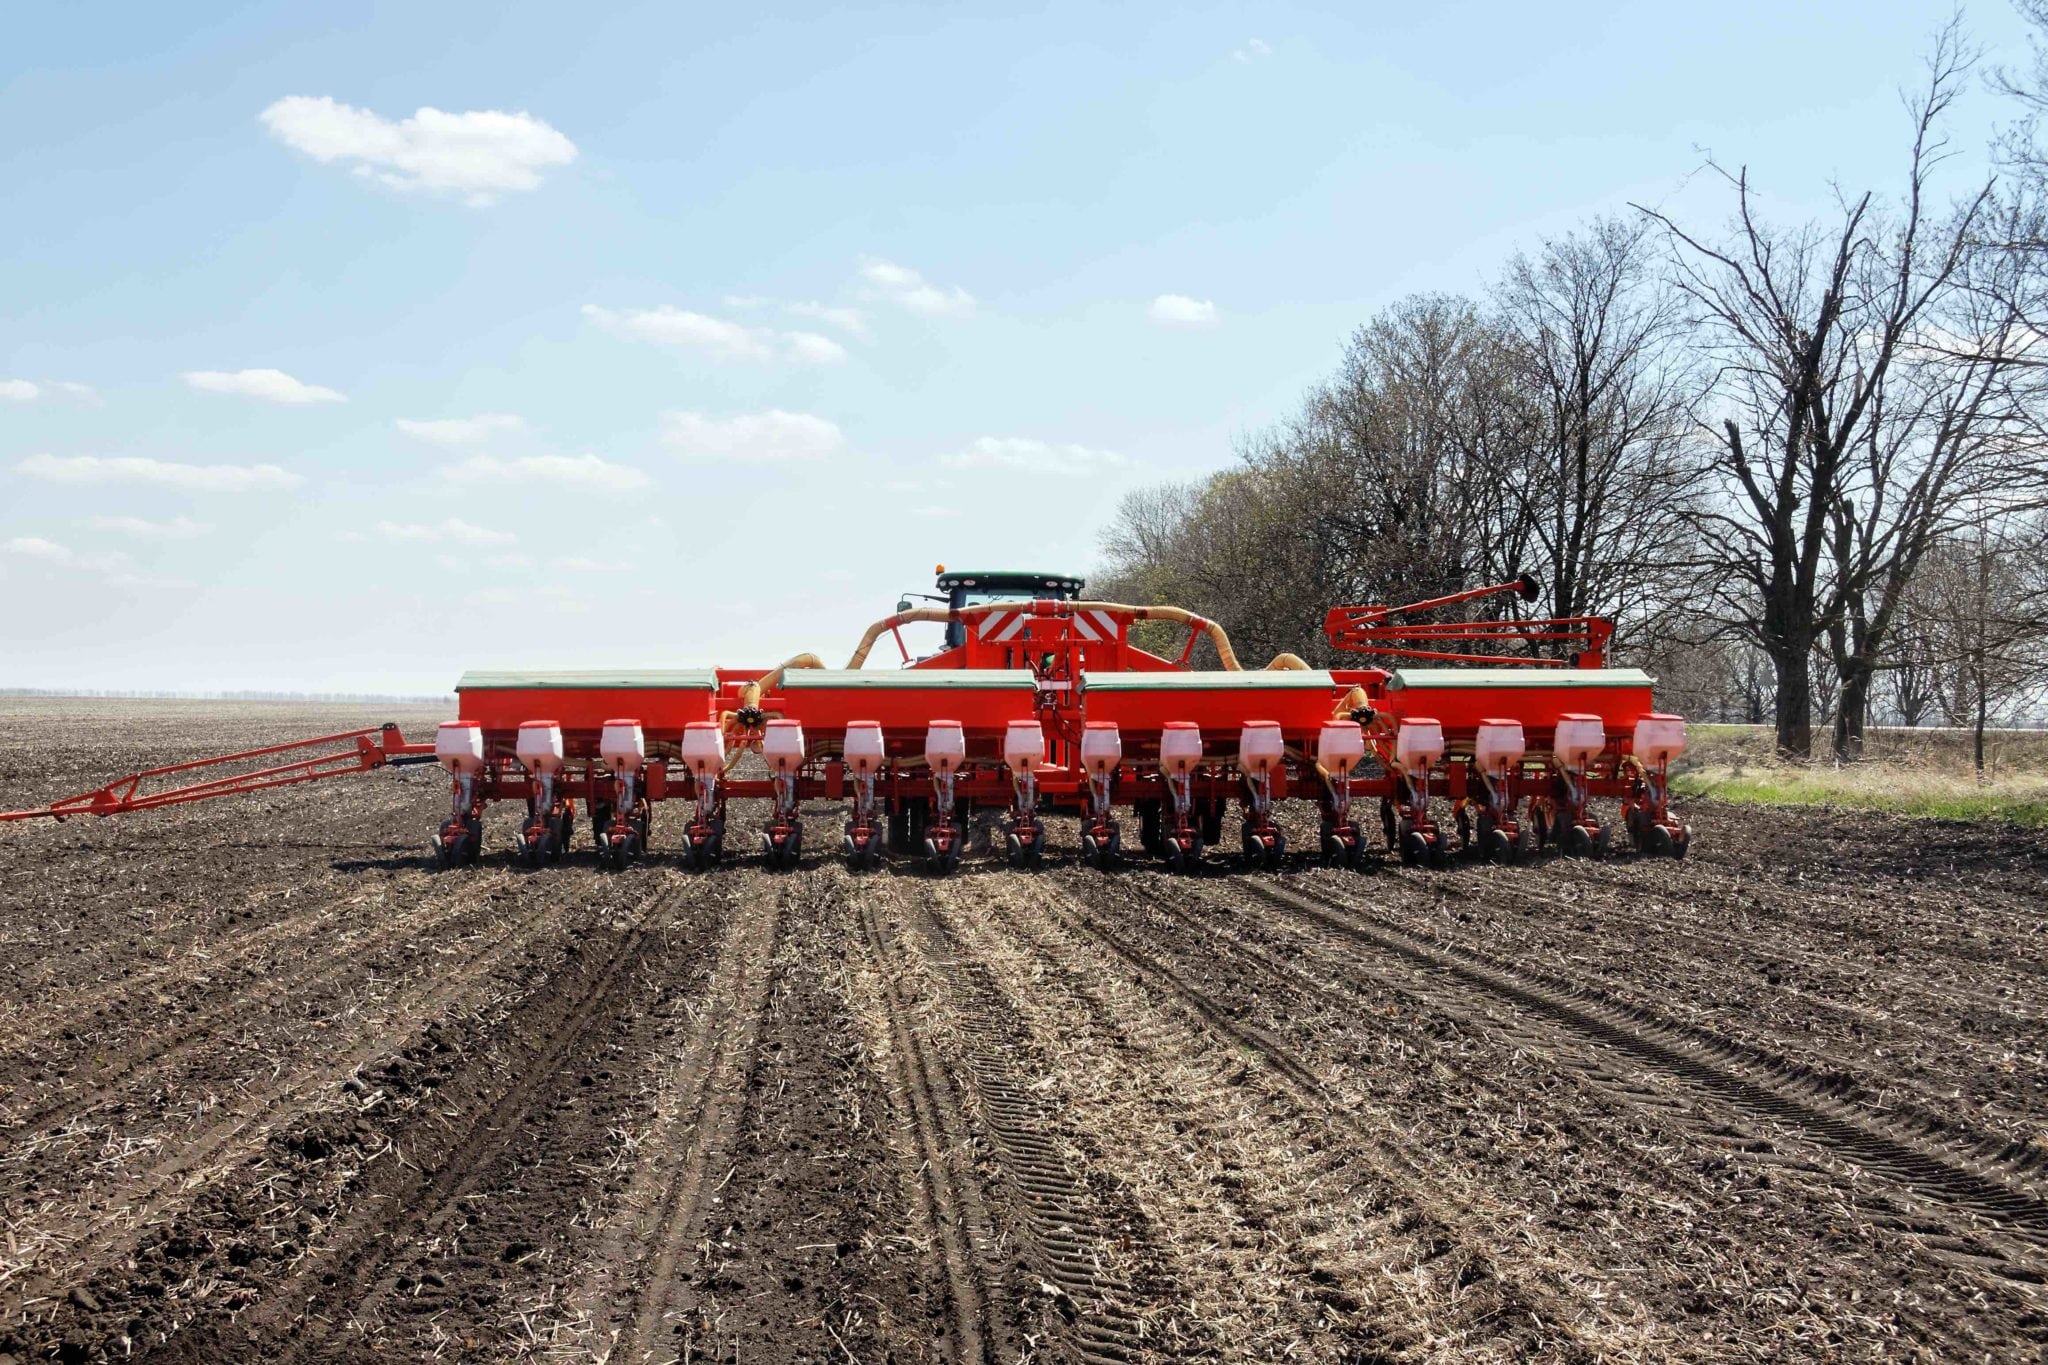
For much of the Mid-Atlantic region, our primary planting dates are between April 1 and May 10 for corn, and April 1 to May 25 for soybeans. Here in 2018, we are off to a cooler than normal and moist spring so far, and as we look at the calendar, we realize this may be a spring where we need to look at other factors to determine the best time to plant this year.
Soil temperatures are one of the primary indicators of when to start planting, if soil conditions are right. However, it is also important to observe the upcoming weather forecast! It is always best to plant into a warming weather pattern as opposed to planting just before a cool rain or just a few days before a week of cool, cloudy weather.
Planting into cool soils, or into a cooling weather pattern can affect the uniformity of emergence. The corn seed often takes it’s first drink of water 30-36 hours after planting, and if that first drink is cold, (below 50 degrees) it will result in imbibitional chilling, which can cause the cell tissue to rupture during expansion, causing the mesocotyl to be twisted or damaged. This injury may result in corkscrewing or leafing out below ground, reducing the chance of uniform emergence or stand establishment.
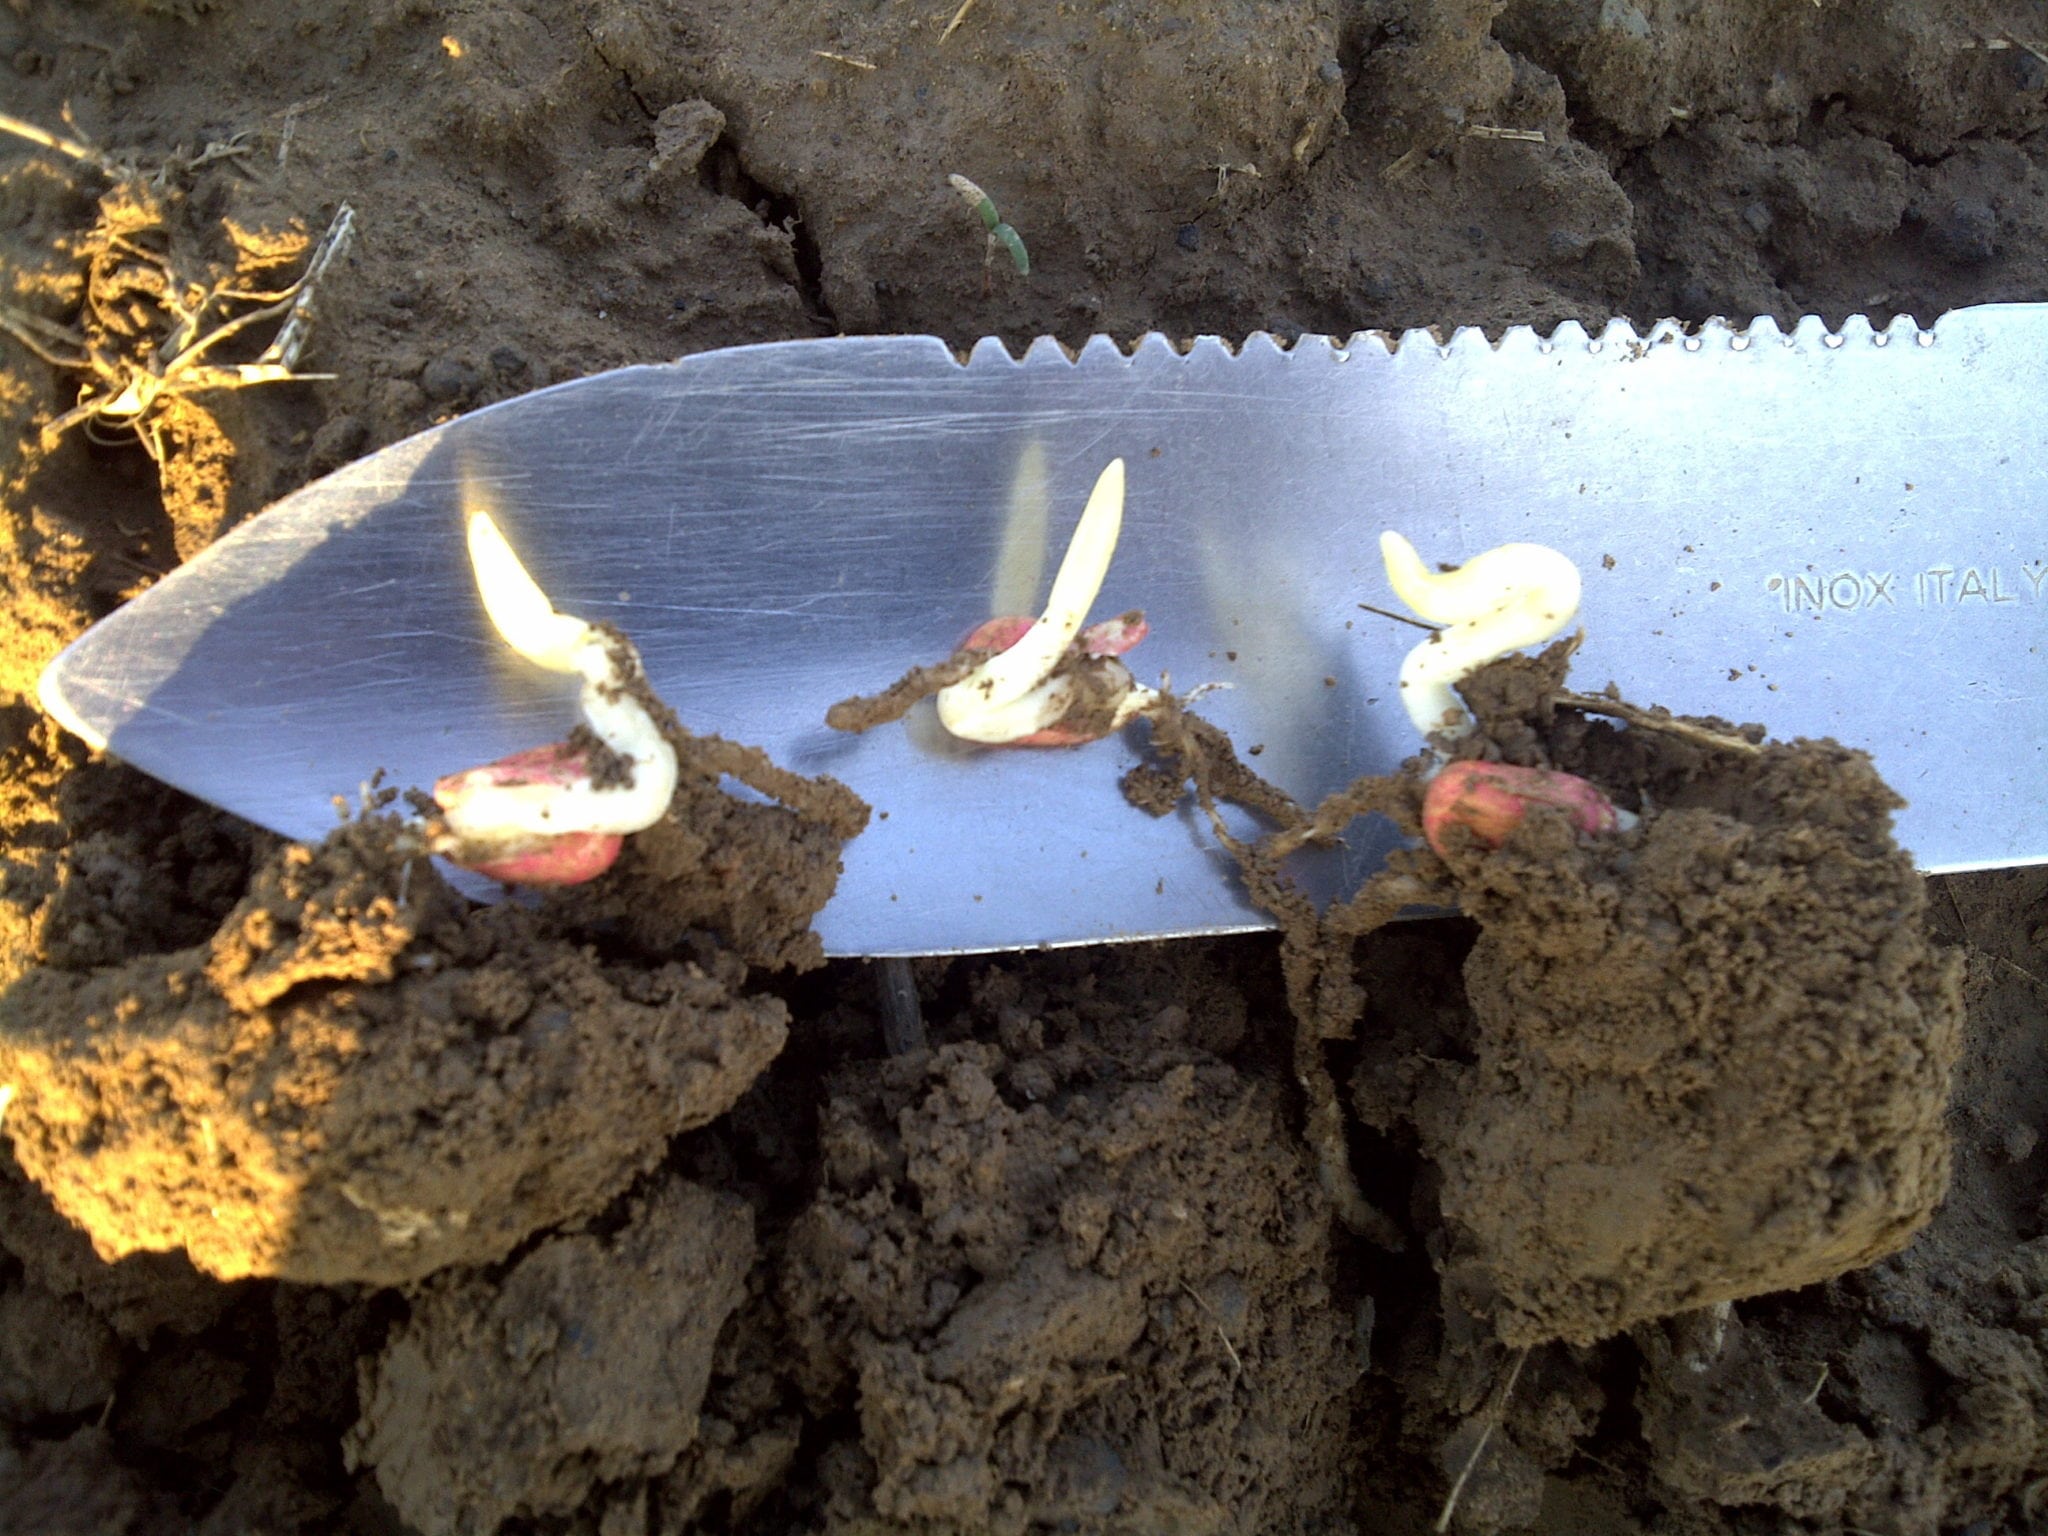
Even if the seedling injured by imbibitional injury does successfully emerge, the injury is likely to prevent proper nutrient uptake of the young seedling, restricting normal development and leaving the plant susceptible to insects or seedling diseases.
Soybeans require different planting conditions than corn. Soybeans take on water more quickly and normally emerge quicker than corn, however, the ideal soil temperature for soybeans is above 55 degrees. Once the soybean plant has germinated and emerged, the growing point is immediately exposed to the elements, whereas the corns growing point stays below ground until about V6 growth stage.
How early is to early to plant soybeans? Progressive growers today start planting soybeans about the same time as corn. The target for soybeans is to have the plant flowering during the longest days of the growing season, which is the end of June. Since soybeans are alight sensitive crop, flowering during the longest days of the year, allows for maximum pod set at each node on the plant.
We know there is a connection between planting soybeans into cold damp soils and the incident of Sudden Death Syndrome (SDS), so when planting early season soybeans, choose genetics that will give you the best possible SDS Resistance. The SDS pathogen enters the young seedling but doesn’t express itself in the plant until the time flowering begins.
The date you started planting may not be the most important factor in 2018!Getting the seedling off to a great start is very important to achieving high yields. Readily available nutrients close to the seed, sets the stage for uniform emergence and healthy vigorous plants.
Products like MegaPower MP which feed the soil microbes and fungi, while providing additional zinc and sulfur, help make nutrients readily available to the new seedling. Starter fertilizers like Xcelerate Corn provide readily available nutrients that you can place directly in the seed zone, delivering essential nutrients to meet the fertility needs of a rapidly growing young plant.
Set your crop up to maximize yield by giving it a vigorous healthy start this spring!
As we look to drive soybean yields higher, we realize that many of the fertility recommendations used in recent history, are based off research done in the middle of the past century. Do today’s genetics require different fertility recommendations? I’ll answer that in this article. There are fundamentals in agronomy that do not change, as well as factors that change over time, and we’ll discuss both below.
When I think of keys to success in high yield soybeans, I think of 6 areas of focus.
- Weather
- Planting dates
- Fertility – Soil fertility and foliar options
- Seed Genetics and Traits
- Row spacing and seeding rates
- Disease protection – Seed treatments and foliar protection
6 Keys to Success in High Yield Soybeans
1. Weather
We all know the biggest variable is often the weather, and we think there is nothing we can do about it but is there? Well, I’ll touch on that in a bit when we get to planting dates. We do know that one of the most critical times for a weather effect on yield is during the pod fill stage of growth. The final 2-3 weeks of pod fill determines around 50% of the yield for the season. Moisture stress, heat stress, or lots of cloudy days during pod fill will impact yields.
2. Plant Dates
Planting dates are something more growers are paying attention to. We know that soybeans are a light-sensitive crop, and if we can get the crop to flower during the longest days of the year, late June to early July, we will have an opportunity to increase pod set. Planting in late April or early May sets you up to flower during the longest days of the year. This timeline also helps us to avoid flowering during the hot days of August, reducing the chance of pod abortion. In this way, we can impact the weather’s effect on the crop.
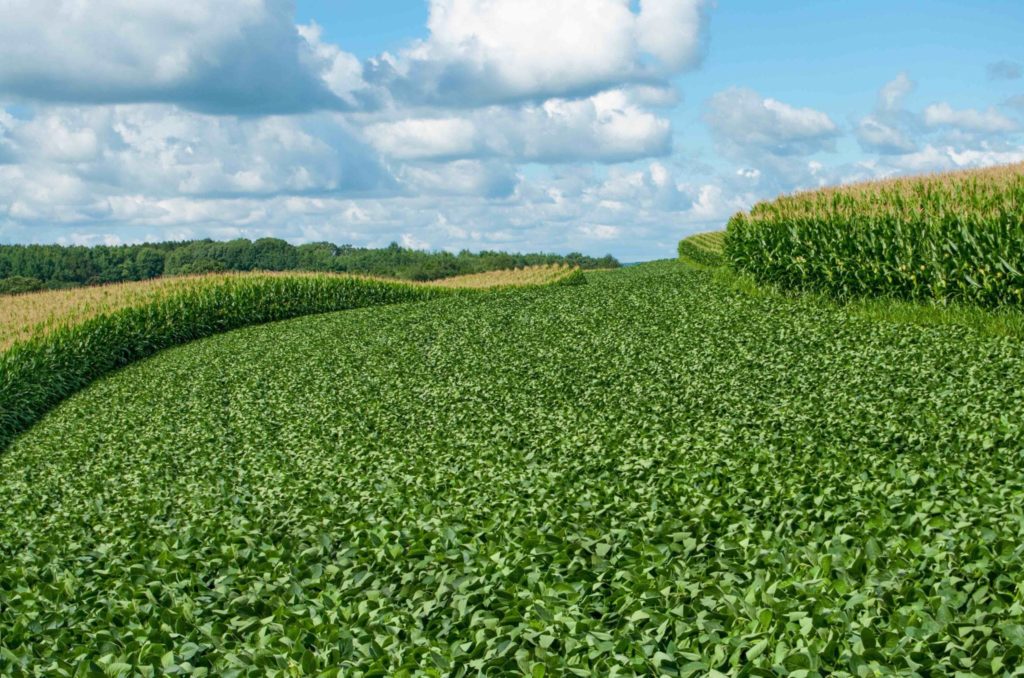
Alternating contour strips of soybeans and corn protect against erosion and soil depletion on a farm in southern Wisconsin.
3. Fertility
Adequate nutrient availability is key to high yields. N-P-K and S are all very important as well as key micronutrients.
To provide adequate N, we must first get great nodulation. High levels of N availability in the soil can decrease nodulation, which can negatively impact grain fill during the reproductive stages. Some studies are suggesting that foliar applied N can be helpful at R2-R3, specifically when yields exceed 75-80 bu/acre. Soybeans utilize the equivalent of 4-5 lbs. of N for every bushel produced, and at very high yield levels, we may be restricted by how much nutrient flow we can actually move from the root and through the plant to support yield.
Are you focused on Phosphorus availability? Did you know that the need and uptake of Phosphorus increases each day from germination out through the next 70-80 days? Have you considered that with earlier planted soybeans and cooler ground conditions there could be a benefit to having more readily available Phosphorus?
We all know that Potash is vital to high yield soybeans, and that maximum uptake of Potassium begins to occur about 40 days after planting (or just before R1) and continues to increase for the next 40-50 days, (through R5). The soybean plant takes in 3 lb. of Potash per acre, per day, during these stages of growth. This is often a time when growers apply small amounts of foliar K to maximize nutrient availability to the plant.
Zinc is vital to early plant growth and is key to chlorophyll production within the plant. Boron helps the plant produce protein and is especially needed during the vegetative and flowering stages of growth, pulling nutrients through the plant to the point where cell division and growth occurs. Manganese plays an important role in photosynthesis, and since soybeans are a light-sensitive crop, soybeans are more sensitive to Manganese deficiency than many other crops. Manganese also supports the production of chlorophyll within the plant.
As you consider nutrient availability, it is important to remember that different soil health, soil types, soil pH, tillage practices, and soil moisture content all contribute to actual plant accessible nutrients. Finding ways to bridge the availability gaps will set you up for increased yield potential. Test your soils frequently and utilize tissue samples as needed to identify key fertility issues that you can address to build yield. PowerAG has several products to use in soybeansthat you may want to consider such as MegaPower MP, HarvestPower MP, BorPower, PK Power, just to name a few.
4. Genetics & Traits
Plant breeding and technology have greatly increased the opportunity for higher yields. Several researchers together with folks at the University of IL recently did a study called, “Modern Soybean Varieties Nutrient Uptake Patterns.” In their research they point out that today’s genetics require higher nutrient accumulation of N, P, Mg, and Ca by up to 18% to support higher yields.
5. Row spacing & Seeding Rates
I’ve seen growers produce 100 bushel per acre soybean yields on both 7″ and 30″ row spacing, so who’s right? Either row spacing has merit, depending on your growing conditions, disease pressure, fertility, and date of planting. There are good reasons to choose either. I suggest that more important than the spacing discussion is the precision with which you plant your crop. Are you getting great seed-soil contact? Are you getting uniform planting depth and coverage? I suggest stand counts between 140-165,000 plants per acre if you desire to achieve 100 bushel beans or higher. I summarized the average plant populations of yield contest winners here in PA, and the average stand counts usually are in the 155-165,000 ppa range.
6. Disease & Pest Protection
The use of seed treatments has increased and become a great tool to fight off seedling disease issues and increase seedling populations. Targeting pests where needed and diseases with a foliar program is recommended where disease thresholds justify the crop protection investment.
Although you’ve probably heard all these tips mentioned before, the growers who pay attention to details in all these areas, are most likely to achieve higher yields.
After a cool, rainy spring we enter the summer months wondering how the fertility plan we started with is holding up to the demands of the crop for this growing season. Just how much Nitrogen has been lost?
The amount of Nitrogen loss depends on multiple factors including rainfall amounts, soil temperatures, use of an N stabilizer and the source of Nitrogen applied. Denitrification is a primary concern because Nitrogen losses are most significant when the N is converted to the nitrate form. Beneficial soil bacteria are at work converting the Nitrogen into a nitrate form which is readily available to the plant. However in the nitrate gas form, soils that are saturated with water will leach away significant portions of the available N, as is easily observed in poorly drained soils, compared to the well drained areas.
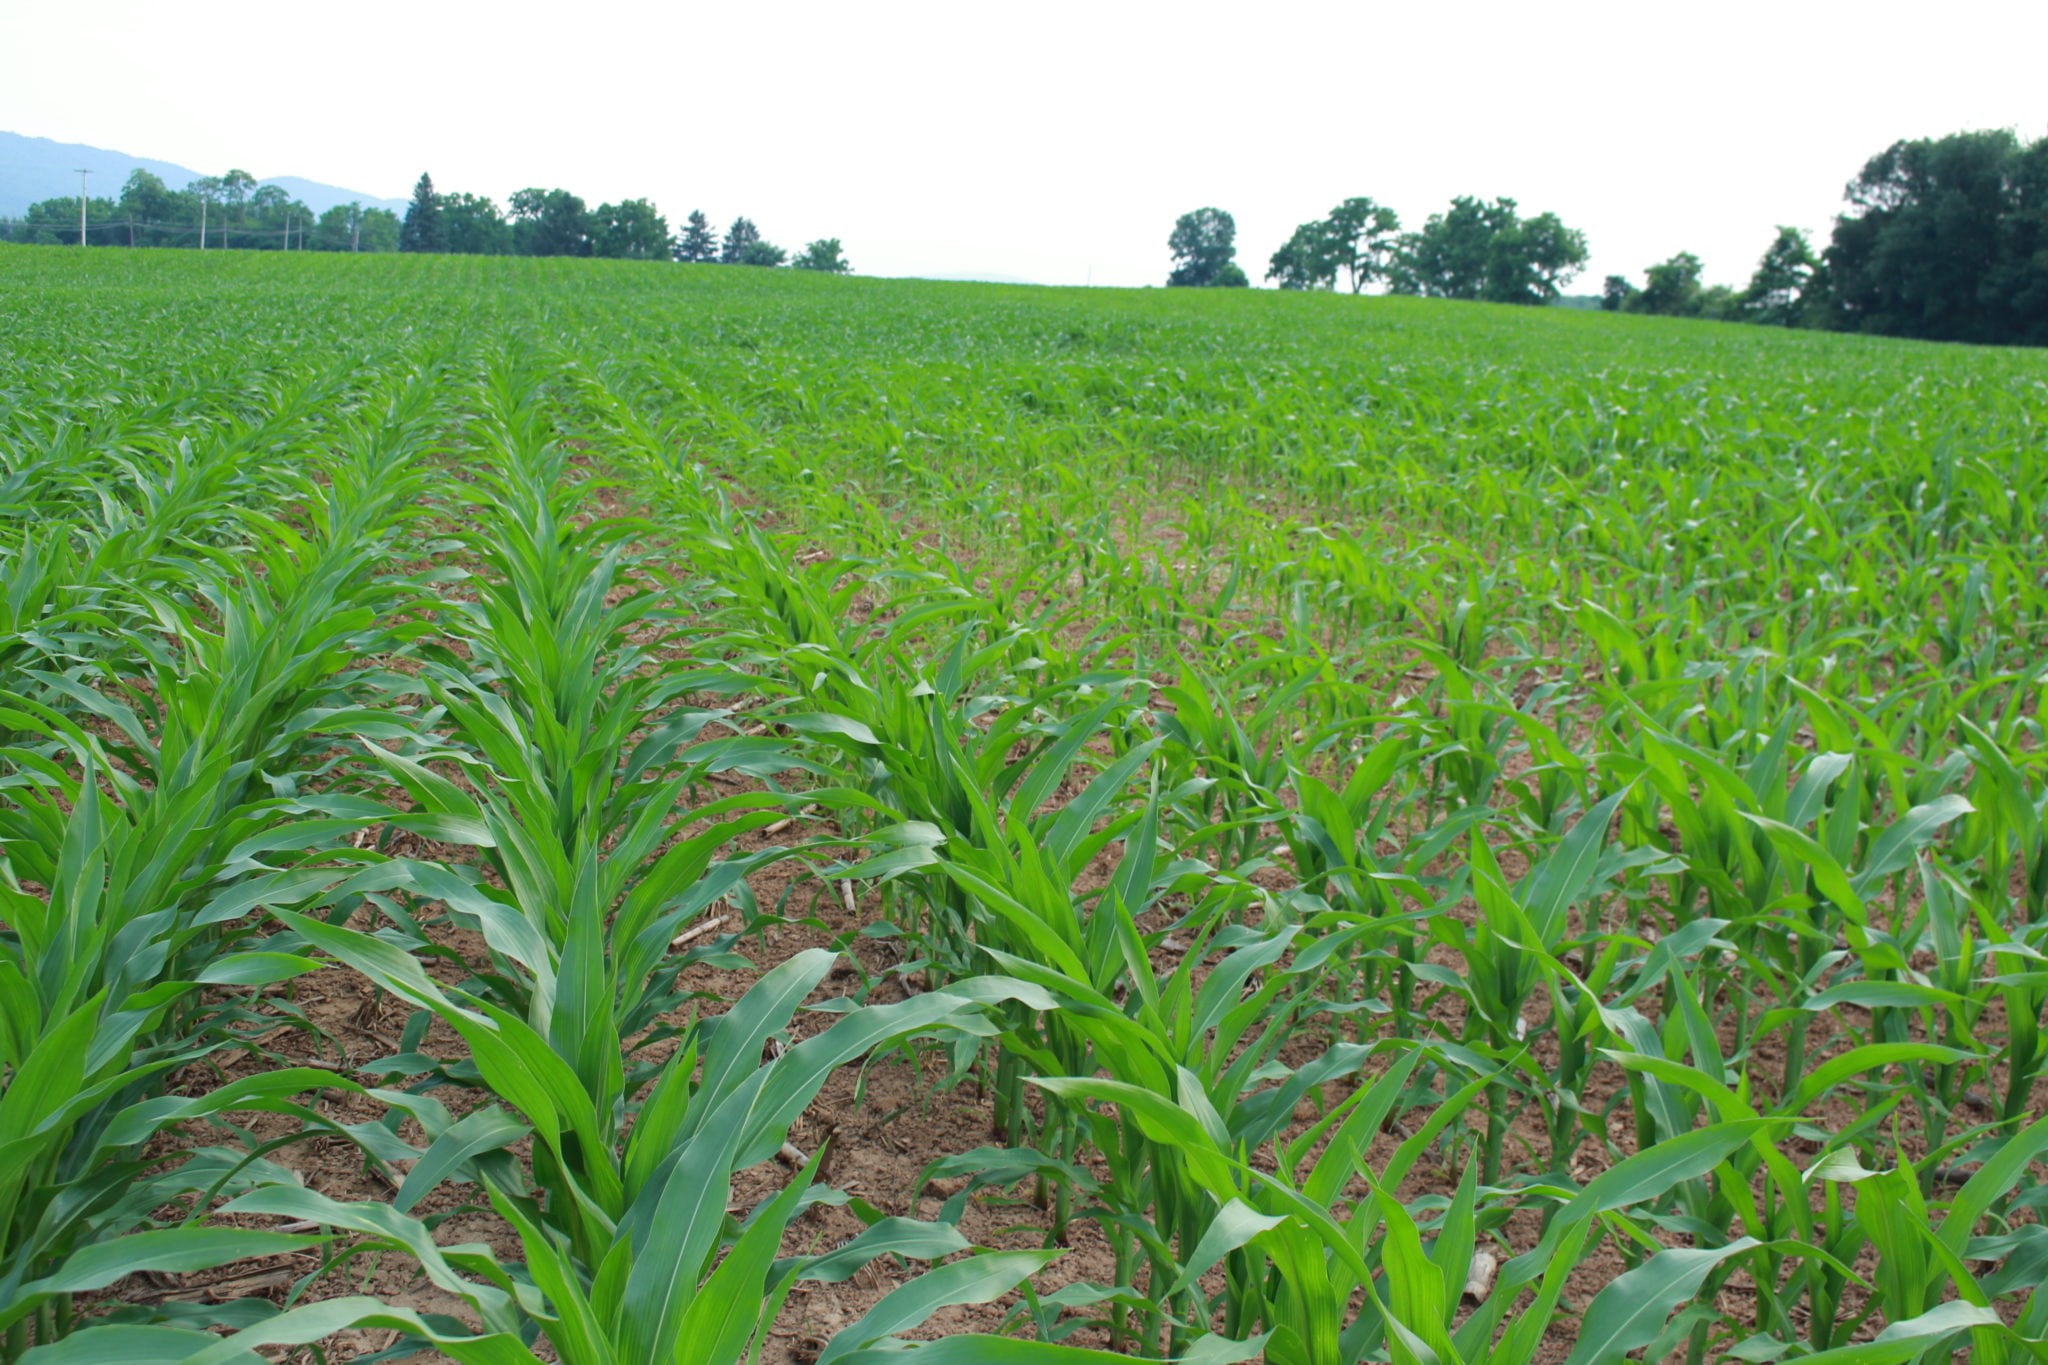
Not every heavy rainfall event sweeps away large portions of nitrate. If the soil is well drained, denitrification is less significant. Excessive water levels can drain away up to 3-5% of the nitrate for each day of soil saturation.
However, we must remember there are other factors to consider. Remember, the Nitrogen losses are most significant when in the nitrate form. Different forms of applied Nitrogen convert to nitrate at different rates, over a period of time. For example…
Urea – by 3 weeks after application has converted 50% to nitrate, and by 6 weeks is at 80%.
UAN – by week 1 is at 25%, by week 3 is at 60% and by week 6 is 80% unless a Nitrogen stabilizer is added.
So, let’s do a little math to illustrate the process described above.
Let’s say I applied 200 units of Nitrogen in the UAN form without a Nitrogen stabilizer, and 3 weeks after application, we have a steady, heavy rain of 5-7″ which keeps the soil saturated for 7+ days. 200 units of N X 60% in nitrate form = 120 units of N nitrate. Let’s suppose it takes 2 days for the saturation process to occur, and then we lose 4% (3-5%) for the next 5 days of saturation, for a total of 24 lbs of Nitrogen.
200 N X 60% = 120 N X 4% Nitrate loss X 5d = 24 lbs lost N
Now the question is, the corn is V7, should I go in and side-dress more N or just let it go? That question is answered differently based on yield goals, stand establishment and high yield objectives. Do you have a good, uniform stand to support high yields? What is your yield target? How can you best maximize your ROI? Remember, 24 units of N can support 25-30 bushels of yield.
You can also test for Nitrogen levels by tissue testing or pulling soil samples. If your soil test shows you have 25 ppm N or more, you likely have adequate Nitrogen available to finish the crop.
Also remember all the other nutrients. Is your corn crop set up to build big yields, or should it be supported with products like HarvestPower MP or NitroSR? The choice is yours.
It’s important to monitor the overall nutrient status of the plant. It’s a little like pulling the dipstick to check the oil or glancing at the fuel gauge before heading to the field. Following up on nutrient availability at this stage of growth, can re-assure you that your crop will develop properly during critical stages of growth, and help you maximize yield.
At PowerAG, we stand ready to help you with additional information and products to support your fertility decisions. Finish Strong!
You only get one chance to do it right this year!
With the planting season upon us, most growers have already taken the first step to set the stage for high yields by choosing elite genetics and properly positioning them by soil type to maximize yields. The next steps are also critical to ensure uniform germination and emergence. Giving the seed a chance to germinate and emerge uniformly sets the stage for higher yields. Without a successful start of the seedling, it is difficult for the crop to fully recover and obtain maximum yield even if the growing season is optimal. Here is a quick review of 5 steps to achieve strong emergence.
- Soil moisture in the seed zone – This is a variable that is difficult to manage without the aid of irrigation. However there are things we can do. Variable soil moisture is affected by soil type, tillage type, tillage patterns, compaction zones and weather patterns. Soil moisture in the seed zone has a big impact on the uniformity of emergence, and there are things you can do to set the seedling up for success. Planting depth plays a big role in ensuring that the seed has adequate moisture. Planting depth may vary by soil type, yet it is a critical factor in establishing a perfect stand. Planting depth of less than 1.5 inches will often increase the variability of emergence. Growers sometimes plant shallow early, thinking that shallow planting will improve emergence in cooler soils, but shallow planting often contributes to uneven emergence because the soil tends to dry out more quickly close to the surface, reducing the availability of soil moisture needed to germinate the seed. Planting depth of 1.5 to 2.0 inches is preferred in most soils, and in sandy soils growers go even deeper to position the seed into adequate moisture.
- Soil temperature in the seed zone – Starting with warm soil is the key to uniform germination and emergence. The corn seed can germinate at temperatures below 50 degrees, however at those temps the emergence will be less likely to be uniform. Soil temps at or above 55 degrees will allow the seed to germinate and emerge within 7 days. It usually takes about 115 GDDs (growing degree days) from the time the seed is placed into the soil until the seedling emerges. There are several things that contribute to uneven soil temperatures. Soil with higher organic matter and dark soils will warm more quickly. Areas of the field that are saturated with water will remain cool longer. Uneven distribution of crop residue during the previous harvest will also play a part, and the use of row-cleaner attachments can have an impact. Furthermore remember, that variability in seed depth will place the seed into different temperature zones and impact the uniformity of emergence.
- Seed to soil contact – This may seem like a no-brainer, but its importance is under-estimated. Getting the soil evenly and snugly positioned around the seed without air pockets is important because it ensures the uniform availability of soil moisture and nutrients to the seed. Another issue is when the crop residue gets hair pinned into the seed trench and the seed doesn’t come into direct contact with the soil. Rough, cloddy soil conditions can also impact germination and emergence. Finally, there is the issue of open seed trenches. Open seed trenches are most often caused by planting into wet soils or hard compacted soils, and can be easily remedied with an array of planter attachment options and enough patience to wait that extra day and then plant into proper soil conditions.
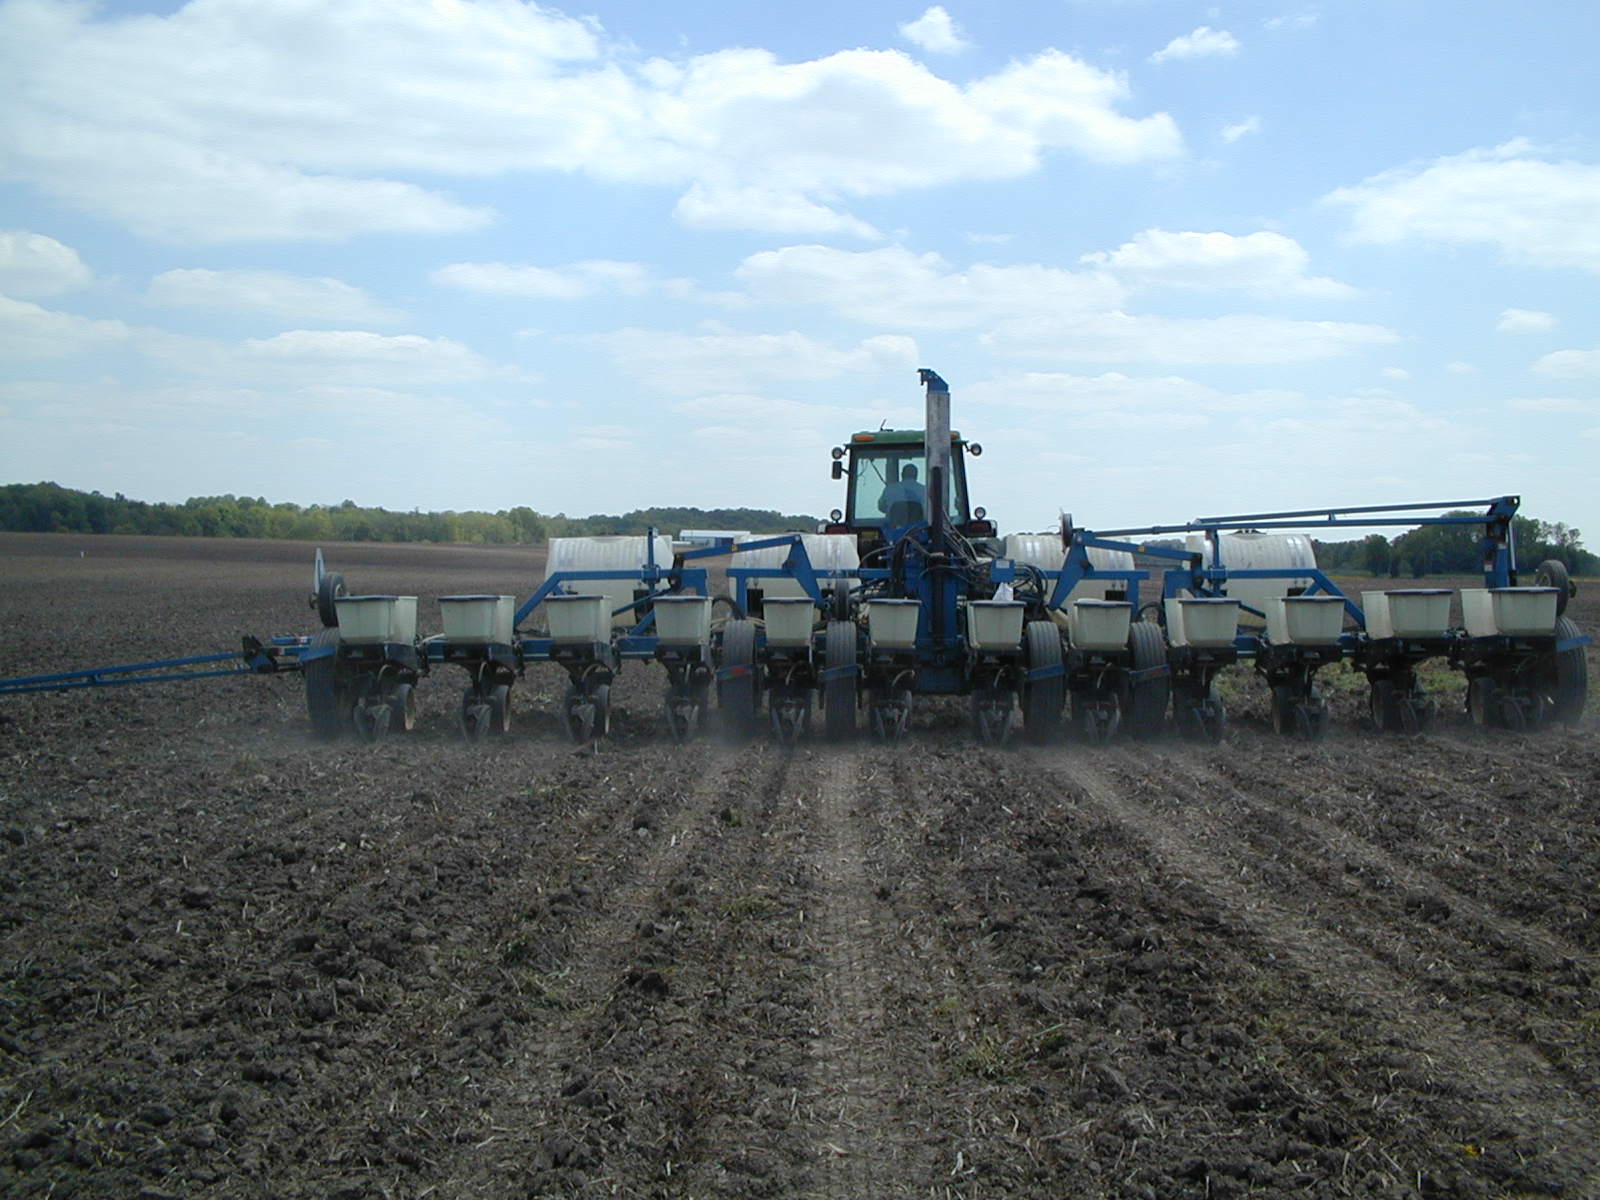
- Soil crusting and sidewall compaction – Avoiding excessive tillage, especially when heavy rainfall is predicted can go a long way to reduce soil crusting. Crusting of the soil layer may severely restrict the emergence of the coleoptile and may cause the seedling to leaf-out underground contributing to seedling death. Side wall compaction may also restrict the elongation of the mesocotyl and hinder the emergence of the coleoptile. The potential for these issues can be reduced by avoiding planting into soils that are too wet. You can also reduce the amount of down pressure on the closing wheels or install finger-style closing wheels on your planter.
- Pop up fertilizers and micronutrients – Getting the seedling off to a great start is very important to achieving high yields. Readily available nutrients close to the seed, sets the stage for healthy, vigorous seedlings. The seedling originally feeds off the carbohydrates stored within the seed itself, but as the seedling grows, it transitions to growing off the radical root system. It becomes very important to make sure that the root zone is unobstructed, has key nutrients available, and can grow and expand rapidly sucking up nutrients and feeding the plant.
Products like M-Power which feed the soil microbes and fungi, help make nutrients available to the plant. Starter fertilizers like Xcelerate 7-18-7 provide readily available nutrients to the root zone, and MaxxPower MP delivers essential micronutrients to meet the fertility needs of a rapidly growing plant.
You only get one chance to do it right each spring, so set up the seedling to finish strong.

